
Manychat
Step 1: Create Flow in Manychat
In Manychat you create 2 flows:
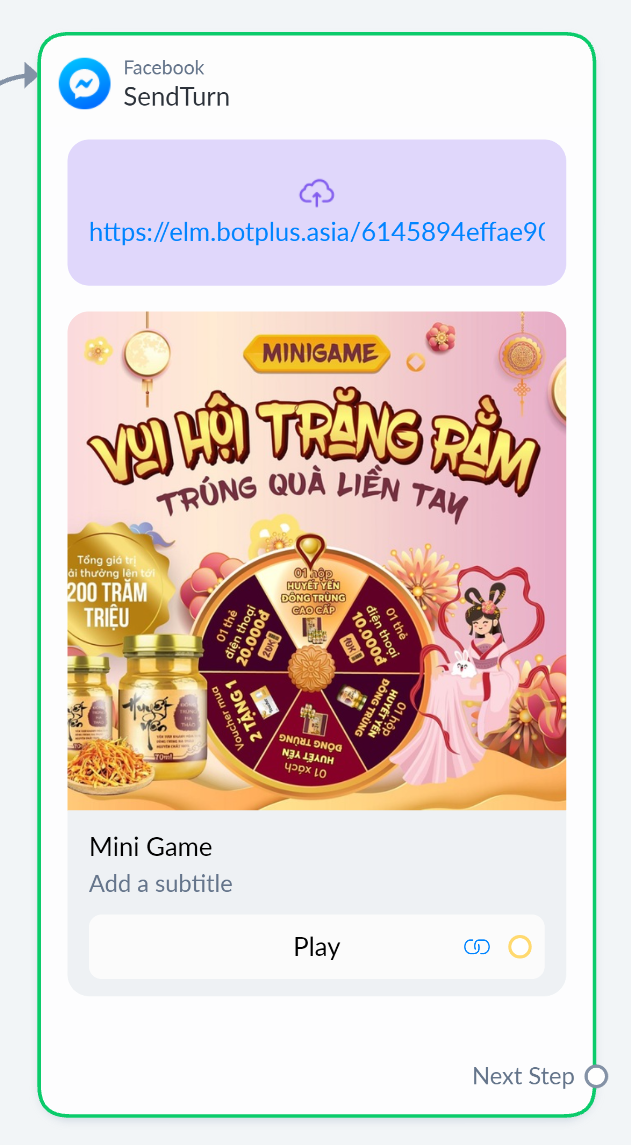
Flow 1: Flow contains a button to turn on the game bot for customers playing Mini Game. When customers press the button, they will be connected to the Bot Game plugin on Botplus.io
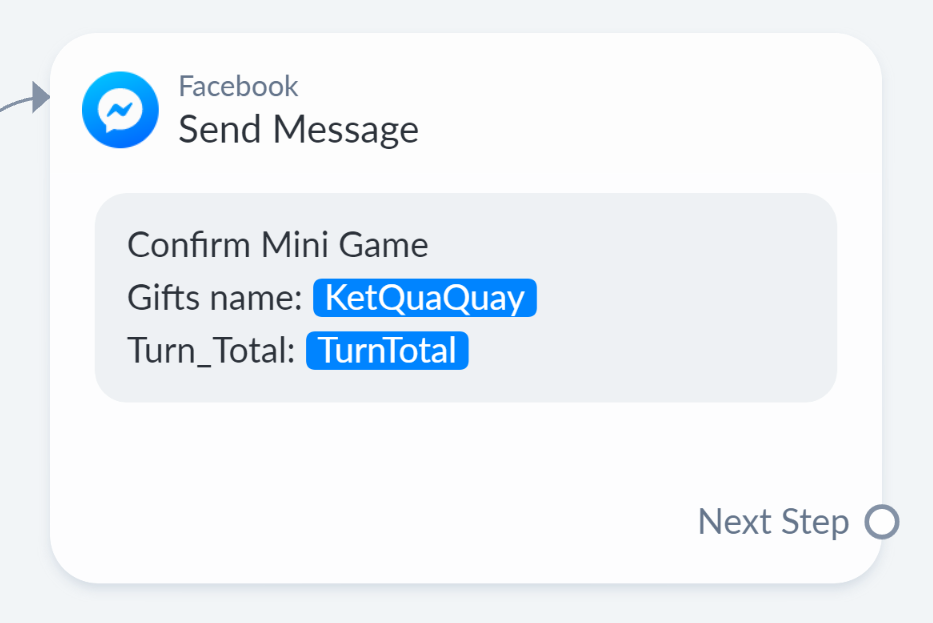
Flow 2: This flow is used to confirm customer information on the chatbot. After the customer finished playing the mini game, the bot will send a confirmation to this flow.

In Flow 1 you create a Dynamic card to connect to the Bot game plugin and a Gallary card containing the Play Button.
Step 2: Connect the plugin to Manychat
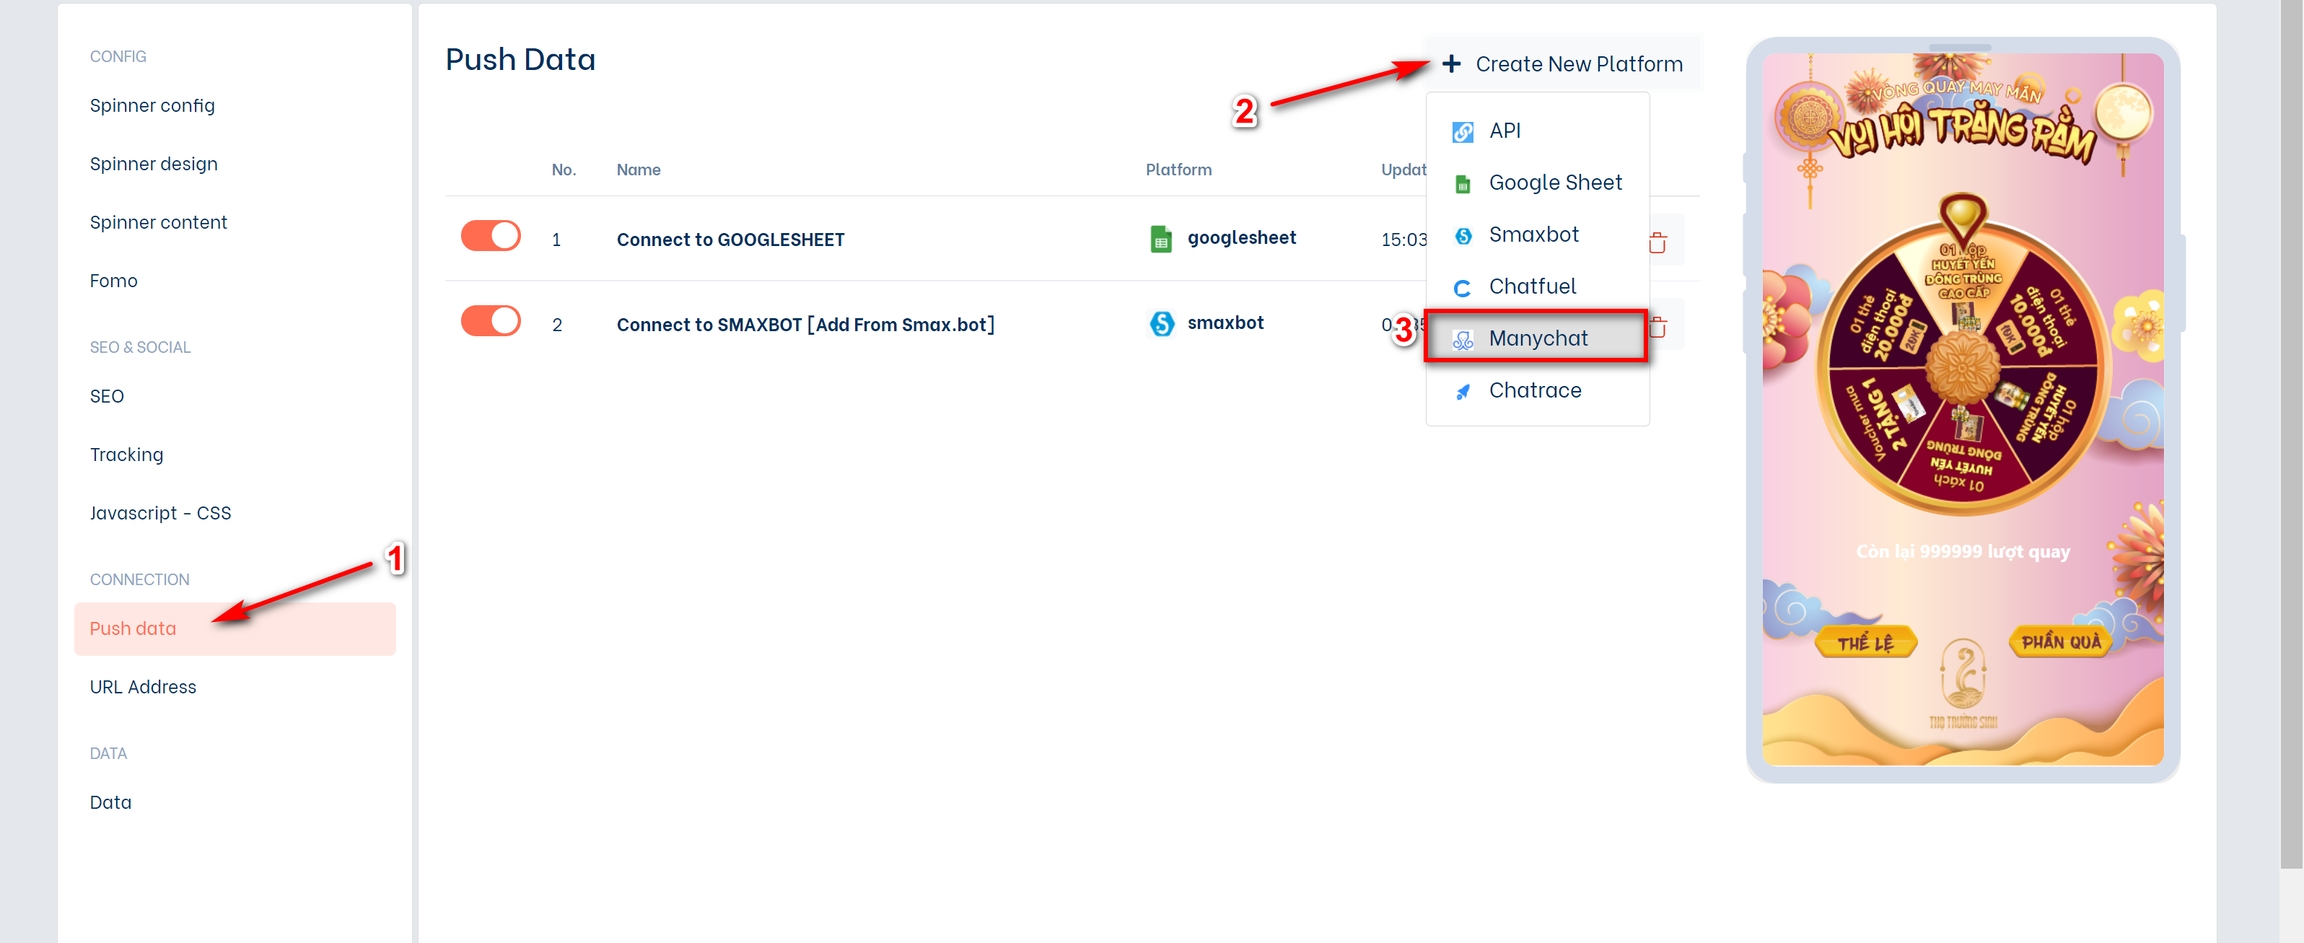
You access the Push data menu on botplus.io then select "Create New Platform" and select Manychat in the drop-down list.
This is the interface to connect Manychat on the plugin.
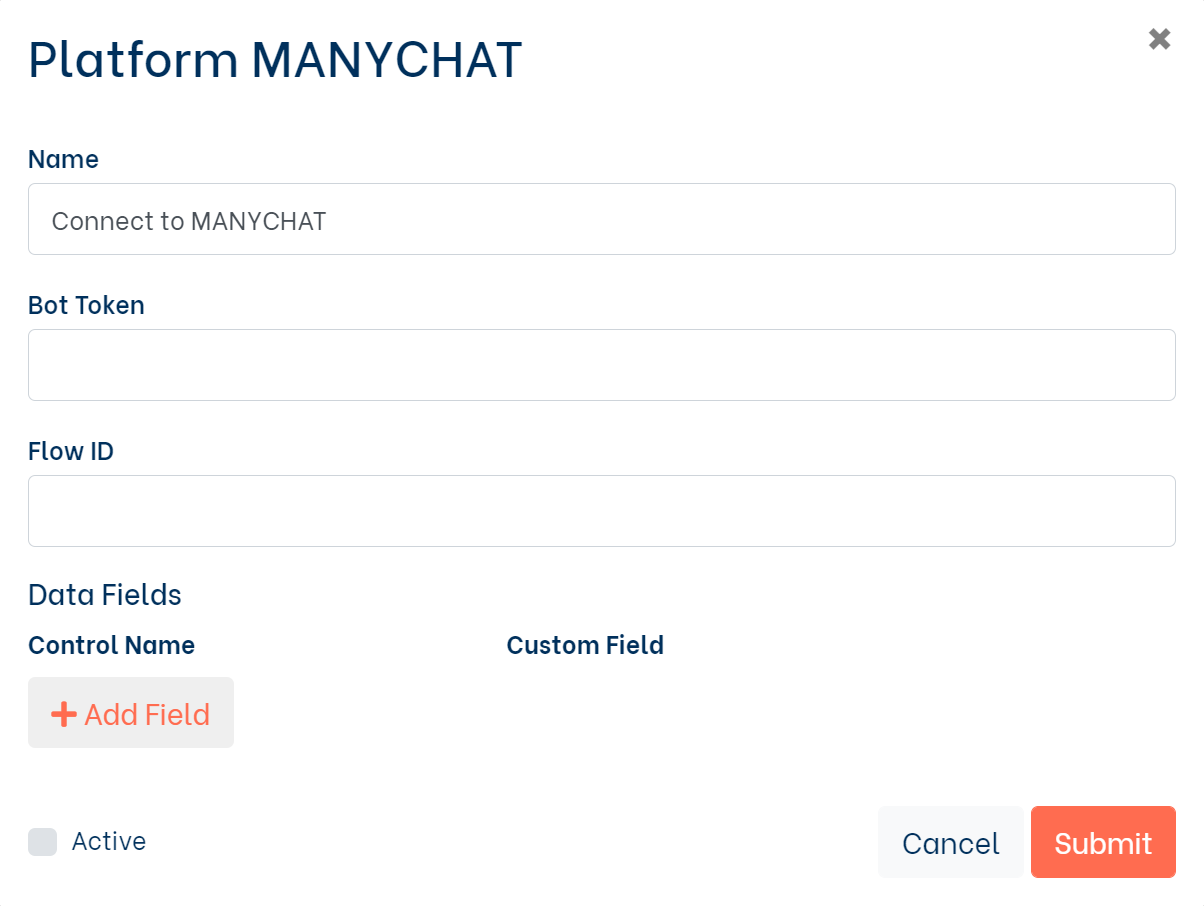
Connect Manychat Platform
Name: Connection Name
Bot Token: Manychat Token
Flow ID: The ID of the flow reconfirms the information after the user completes it.
Data Fields: Data fields to push from bots to Chatbot
To fill in the Bot Token, Flow ID fields, please see the next step
Step 3: Configure the connection
Copy the Flow ID, go to Flow 2 and copy ID in URL. See picture (starting from the content ...)

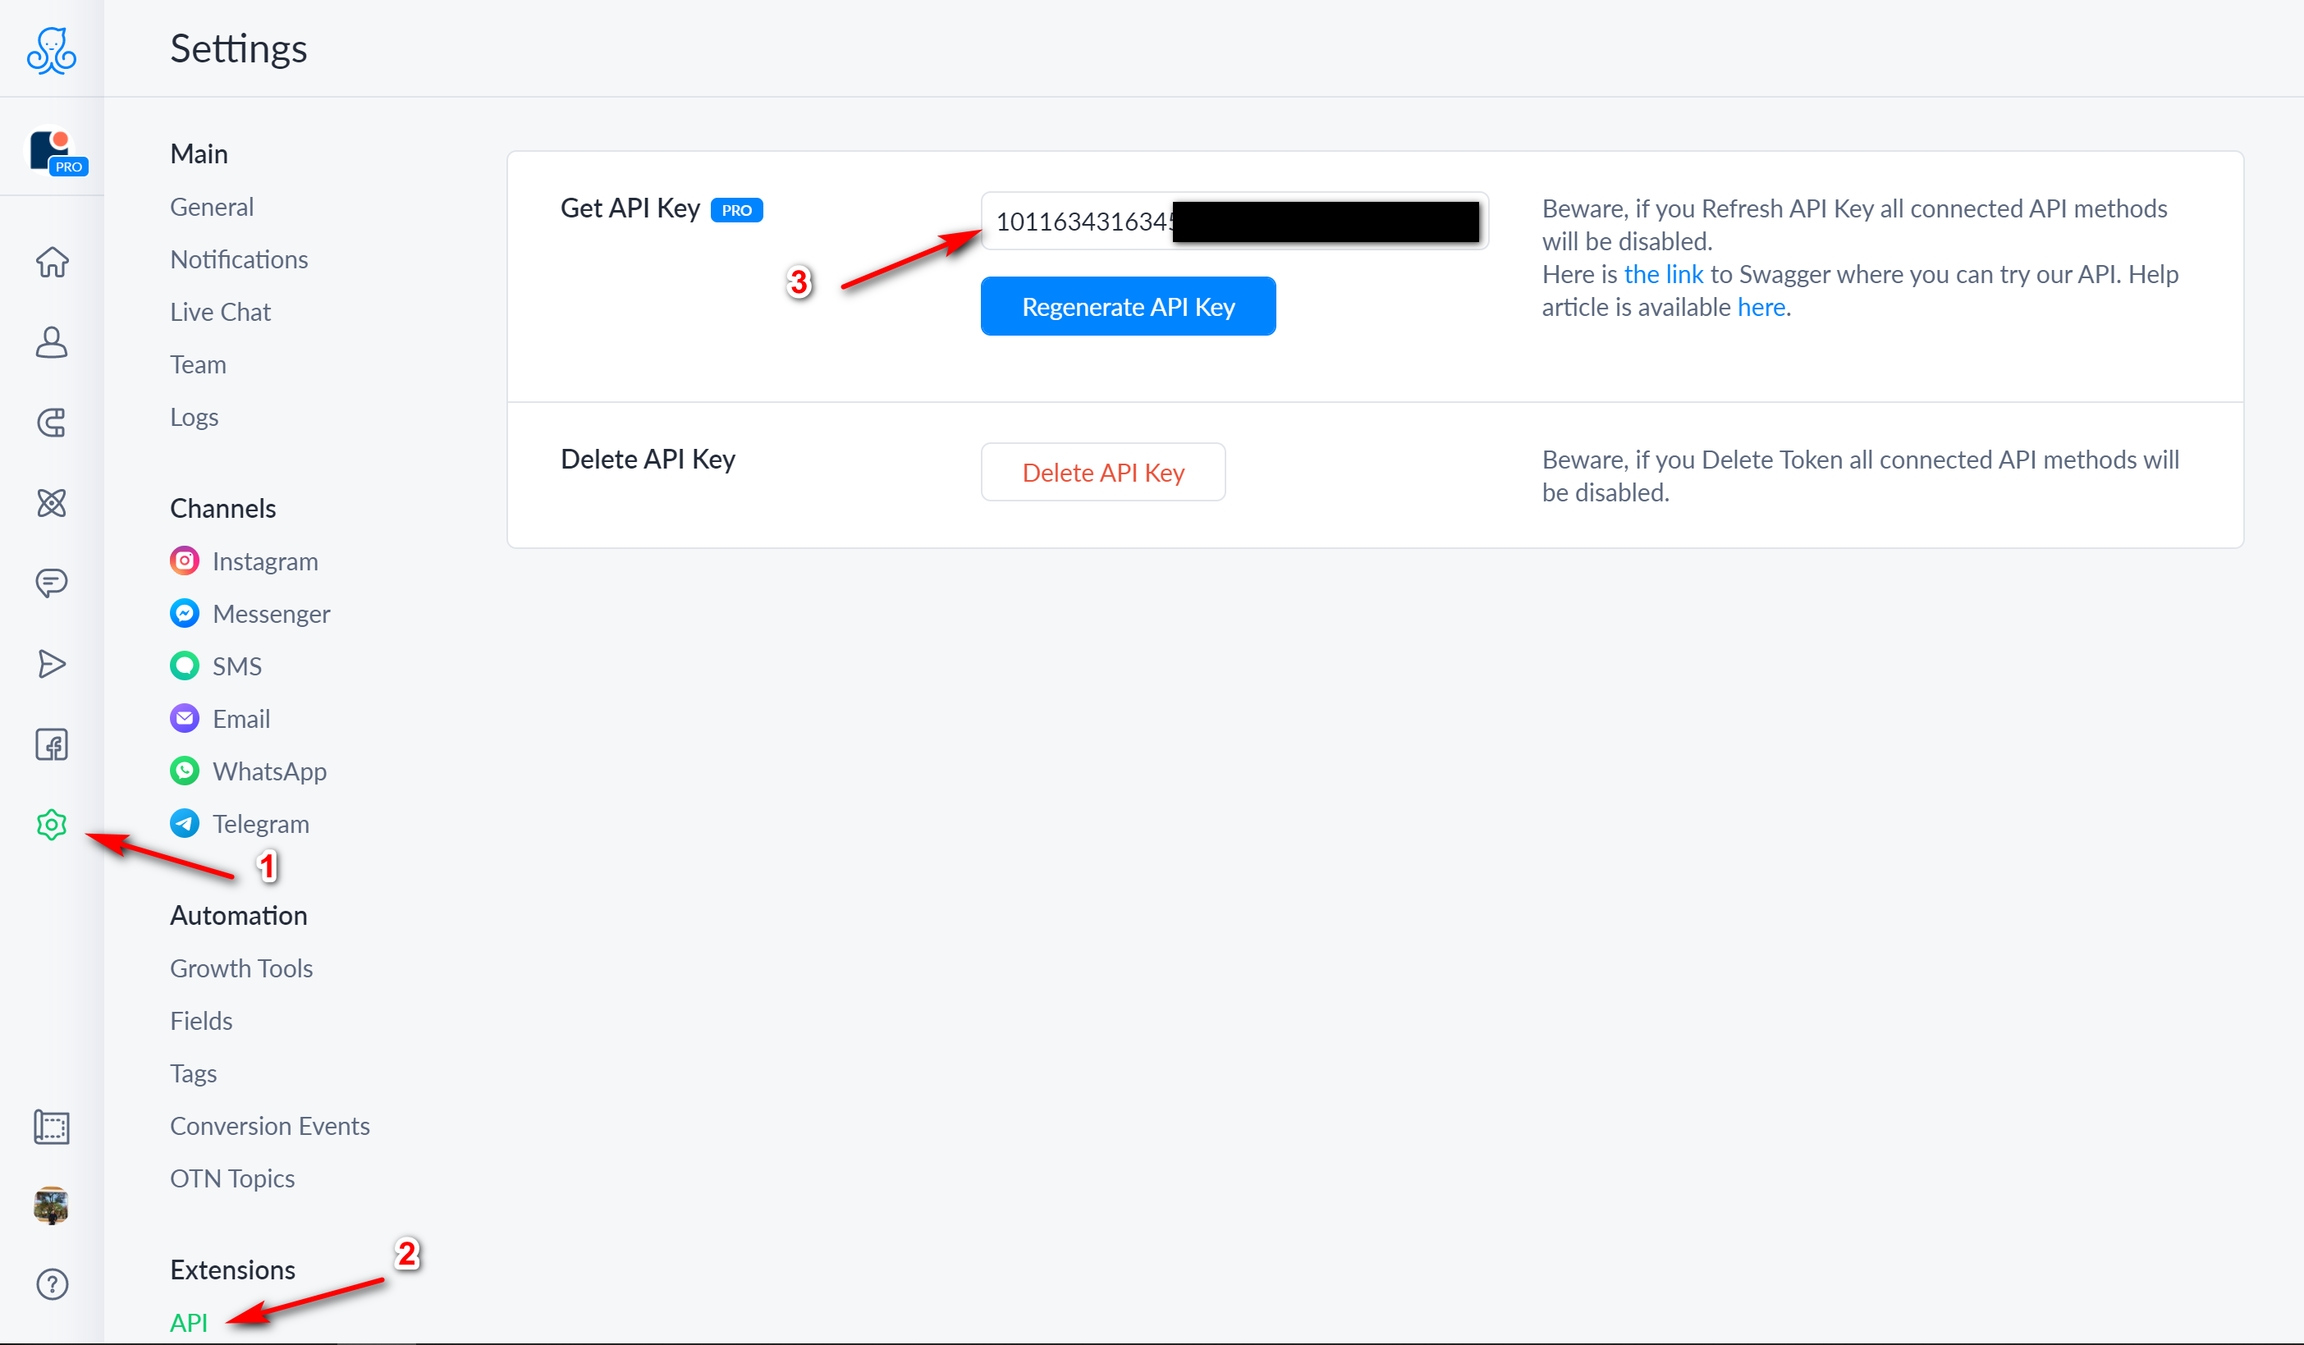
After copying the Flow ID, go to Settings, Click to API in the list and copy the API Token segment of Manychat and paste it into the Bot Token section.
Step 4: Configure data transfer from botplus.io
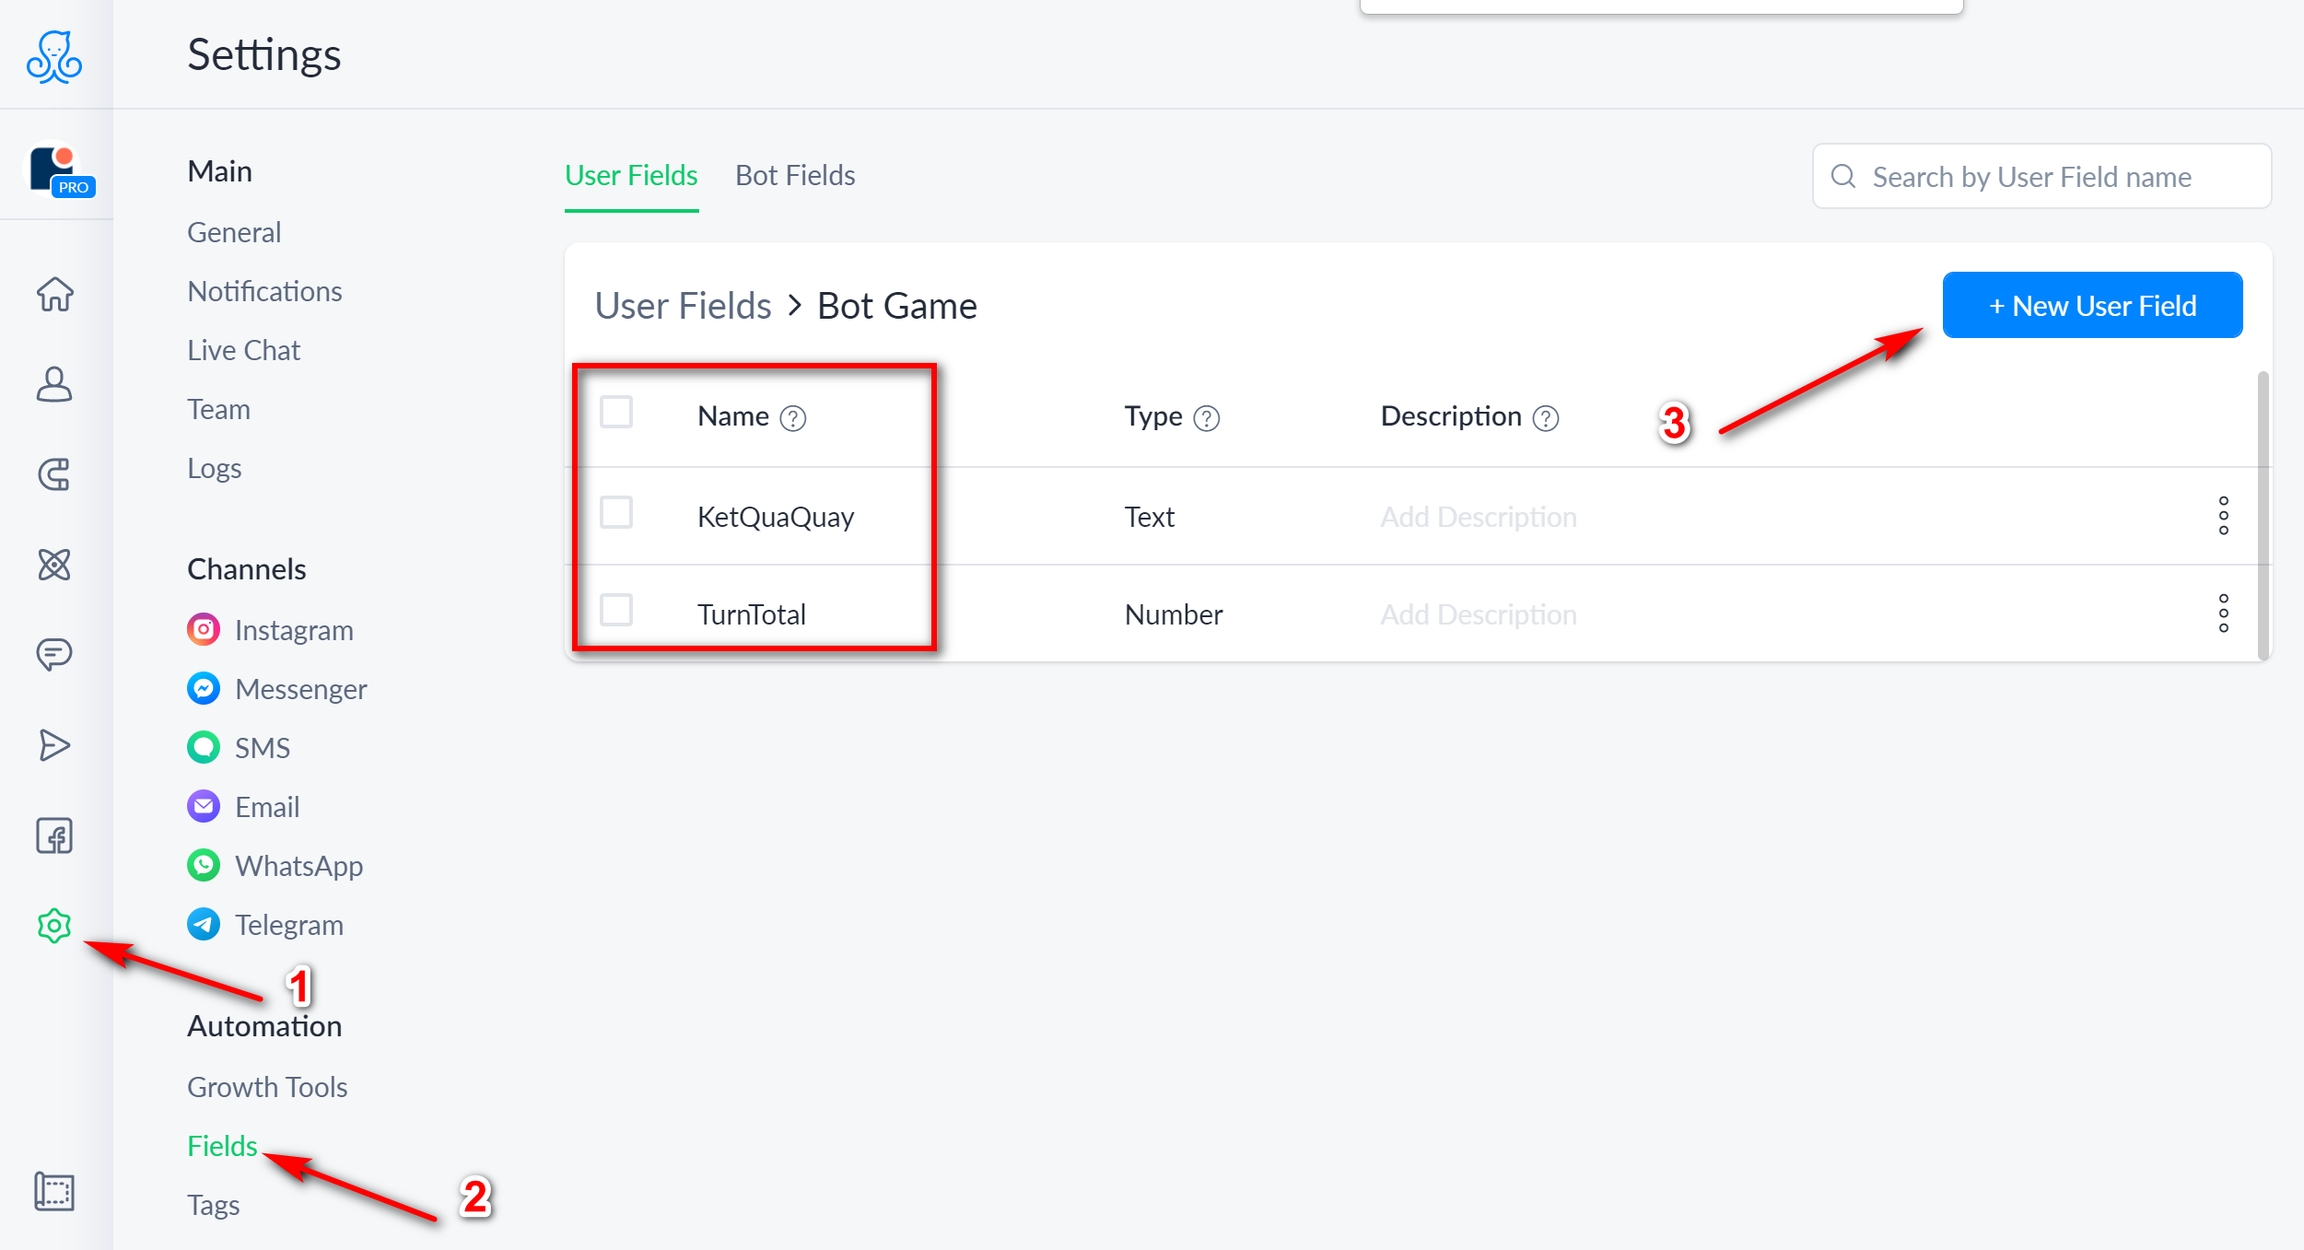
4.1: On Manychat, go to Settings, select Fields, then create User Fields corresponding to the customer's confirmation information.
4.2: In the configuration panel of the Push Data section, select Add Field to add data fields sent to Manychat
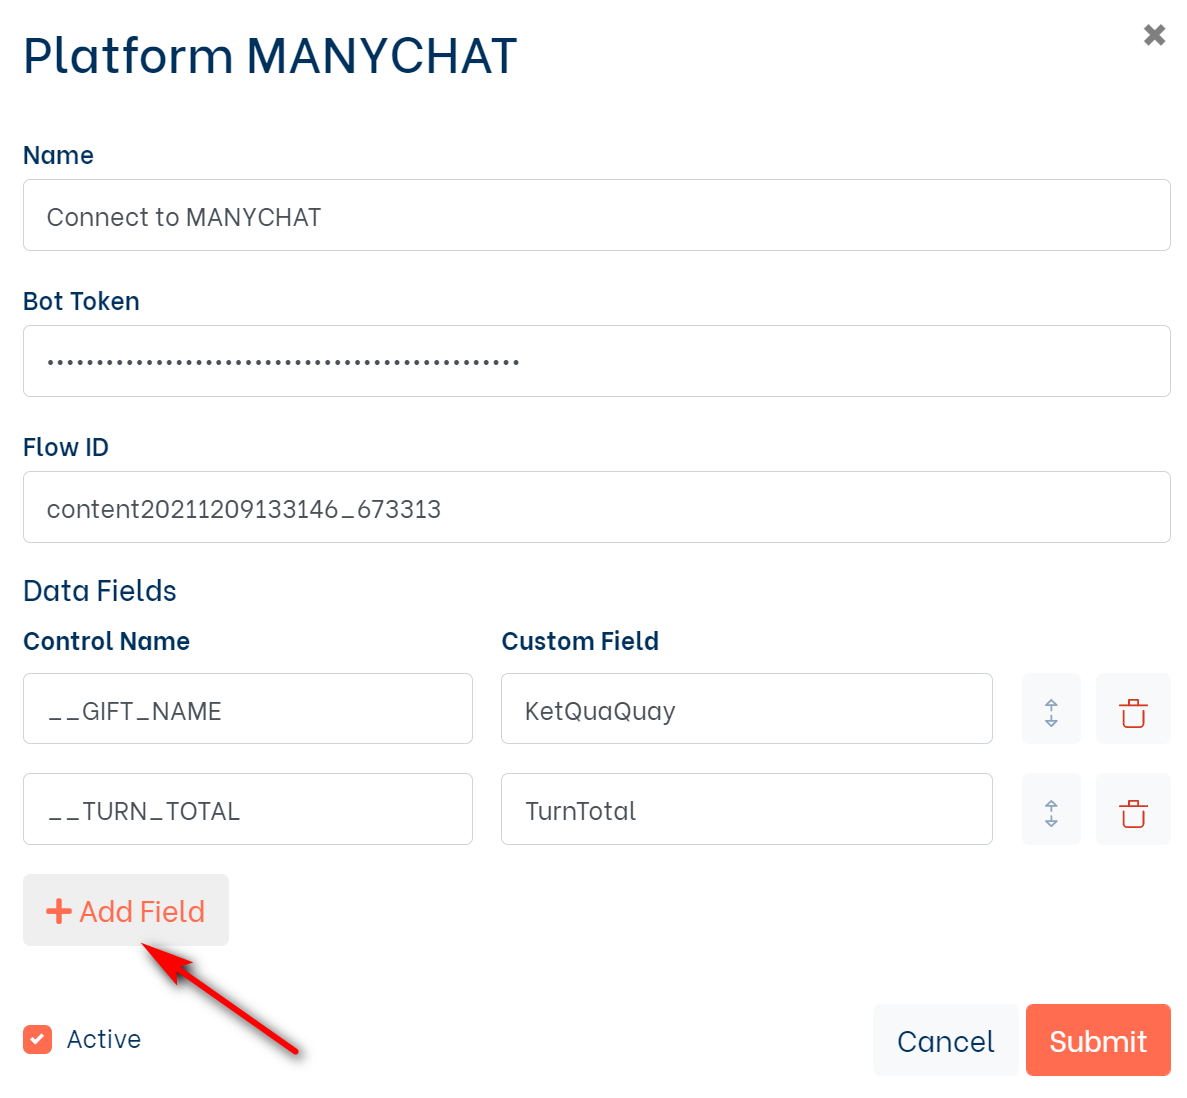
Select the Control Name section and you will see the data fields, this field is created during the process of you building the Webview. And the default fields eg: Money Total, Products of the Shop section.
The control Name column is the variable name column that you get in the form, and the Custom Field column is the custom field that you want to pass on to the bot.
Click Active and Submit to save the connection configuration.
Step 5: Build Flow 2
In Flow 2, you create a Text card and enter custom fields to this card.
Bước 6: Configure URL for Webview
You choose to Menu URL Address (1) and select User free domain
You can customize the items in the free domain to fit your needs. Ex: game.botplus.asia/minigame
You can use "Use own domain" to use your own domain Ex: Shopthoitrang.vn
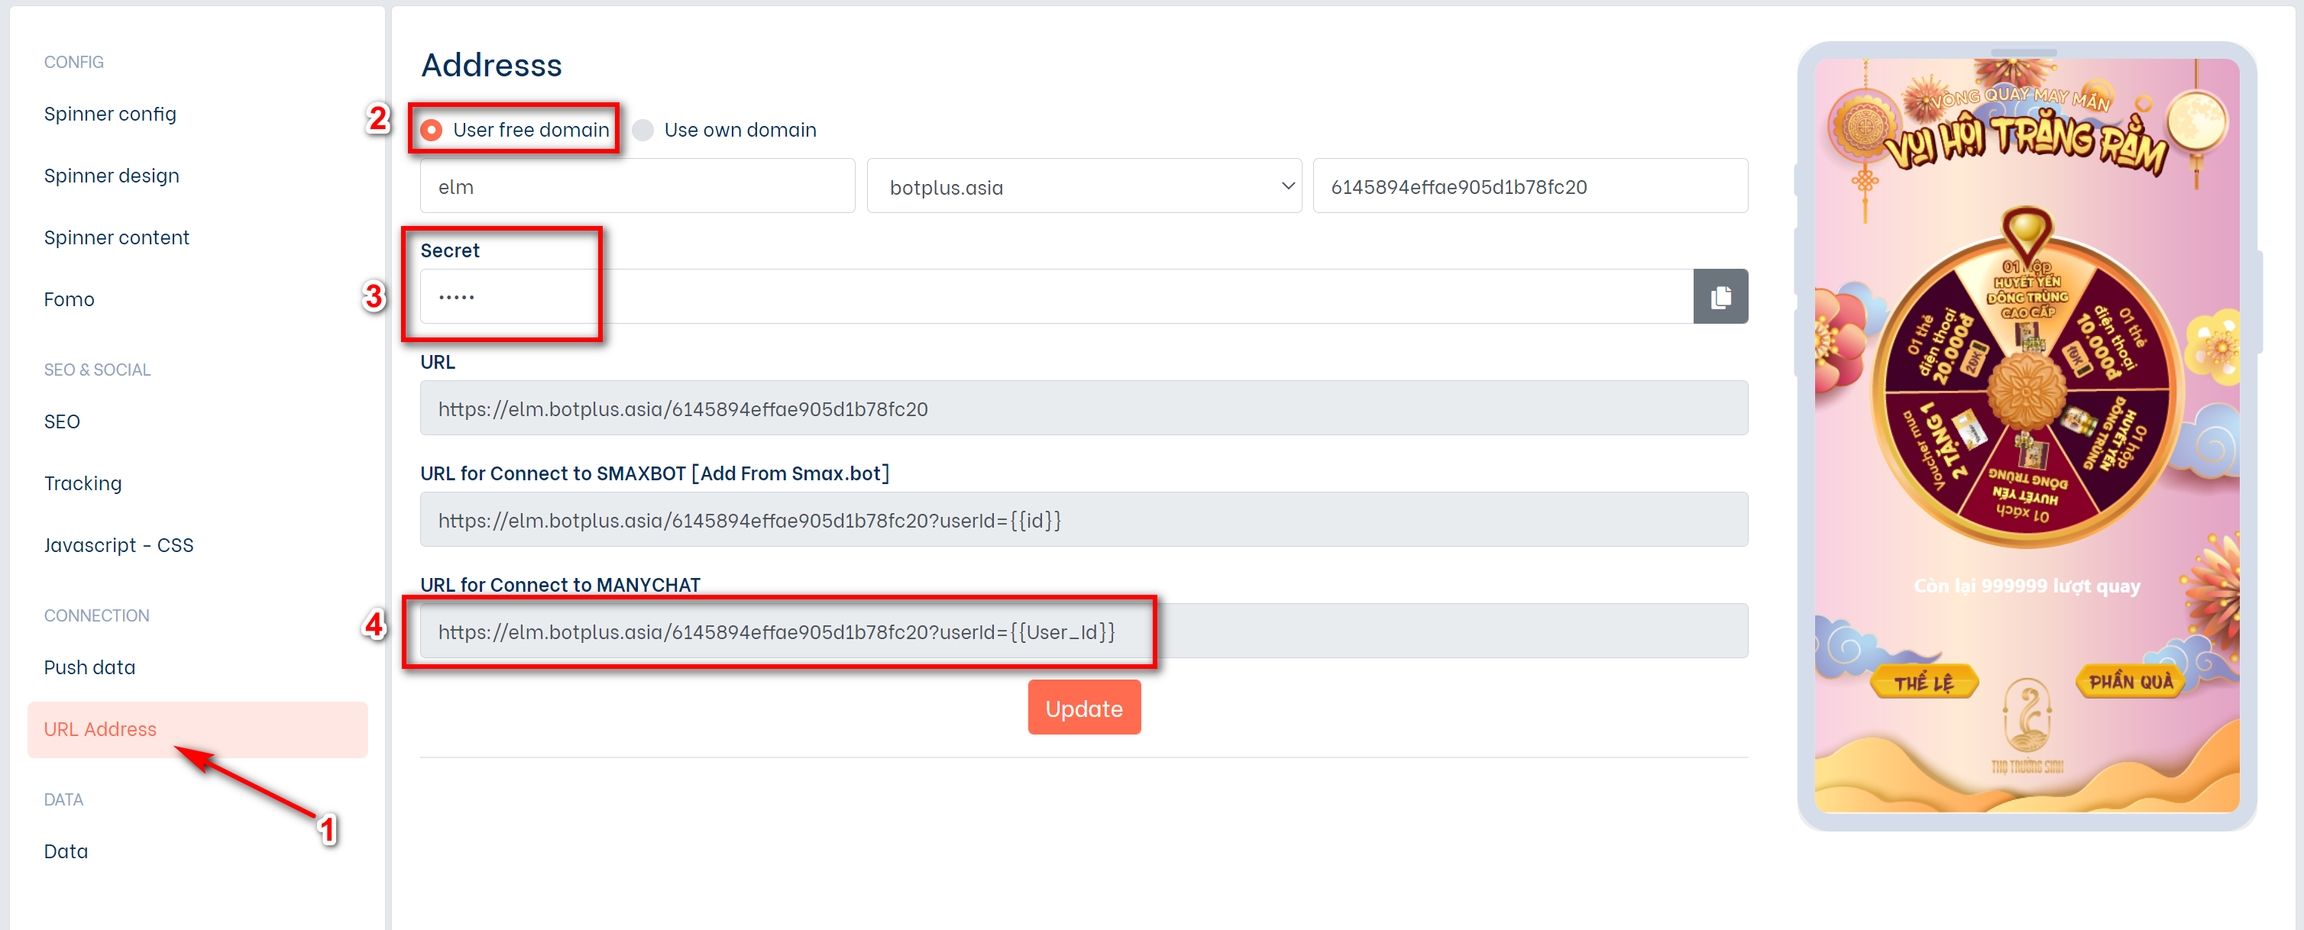
Enter any code used as a security code in Secret (3).
Bạn ấn Update sau đó chọn vào mục 4 để copy link dành cho Manychat (link trong phần URL phía trên sử dụng khi bạn muốn chạy web mà ko cần nhúng vào chatbot)
Bước 7: Kết nối link Bot Game vào Button và truyền dữ liệu lượt chơi lên bot game.Cấu hình Dynamic Card
7.1: Tryền lượt chơi lên botgame
Ở Flow 1 bạn tạo 1 thẻ Dynamic ở trên cùng.
Bật thẻ Dynamic và cấu hình thẻ như bên dưới.
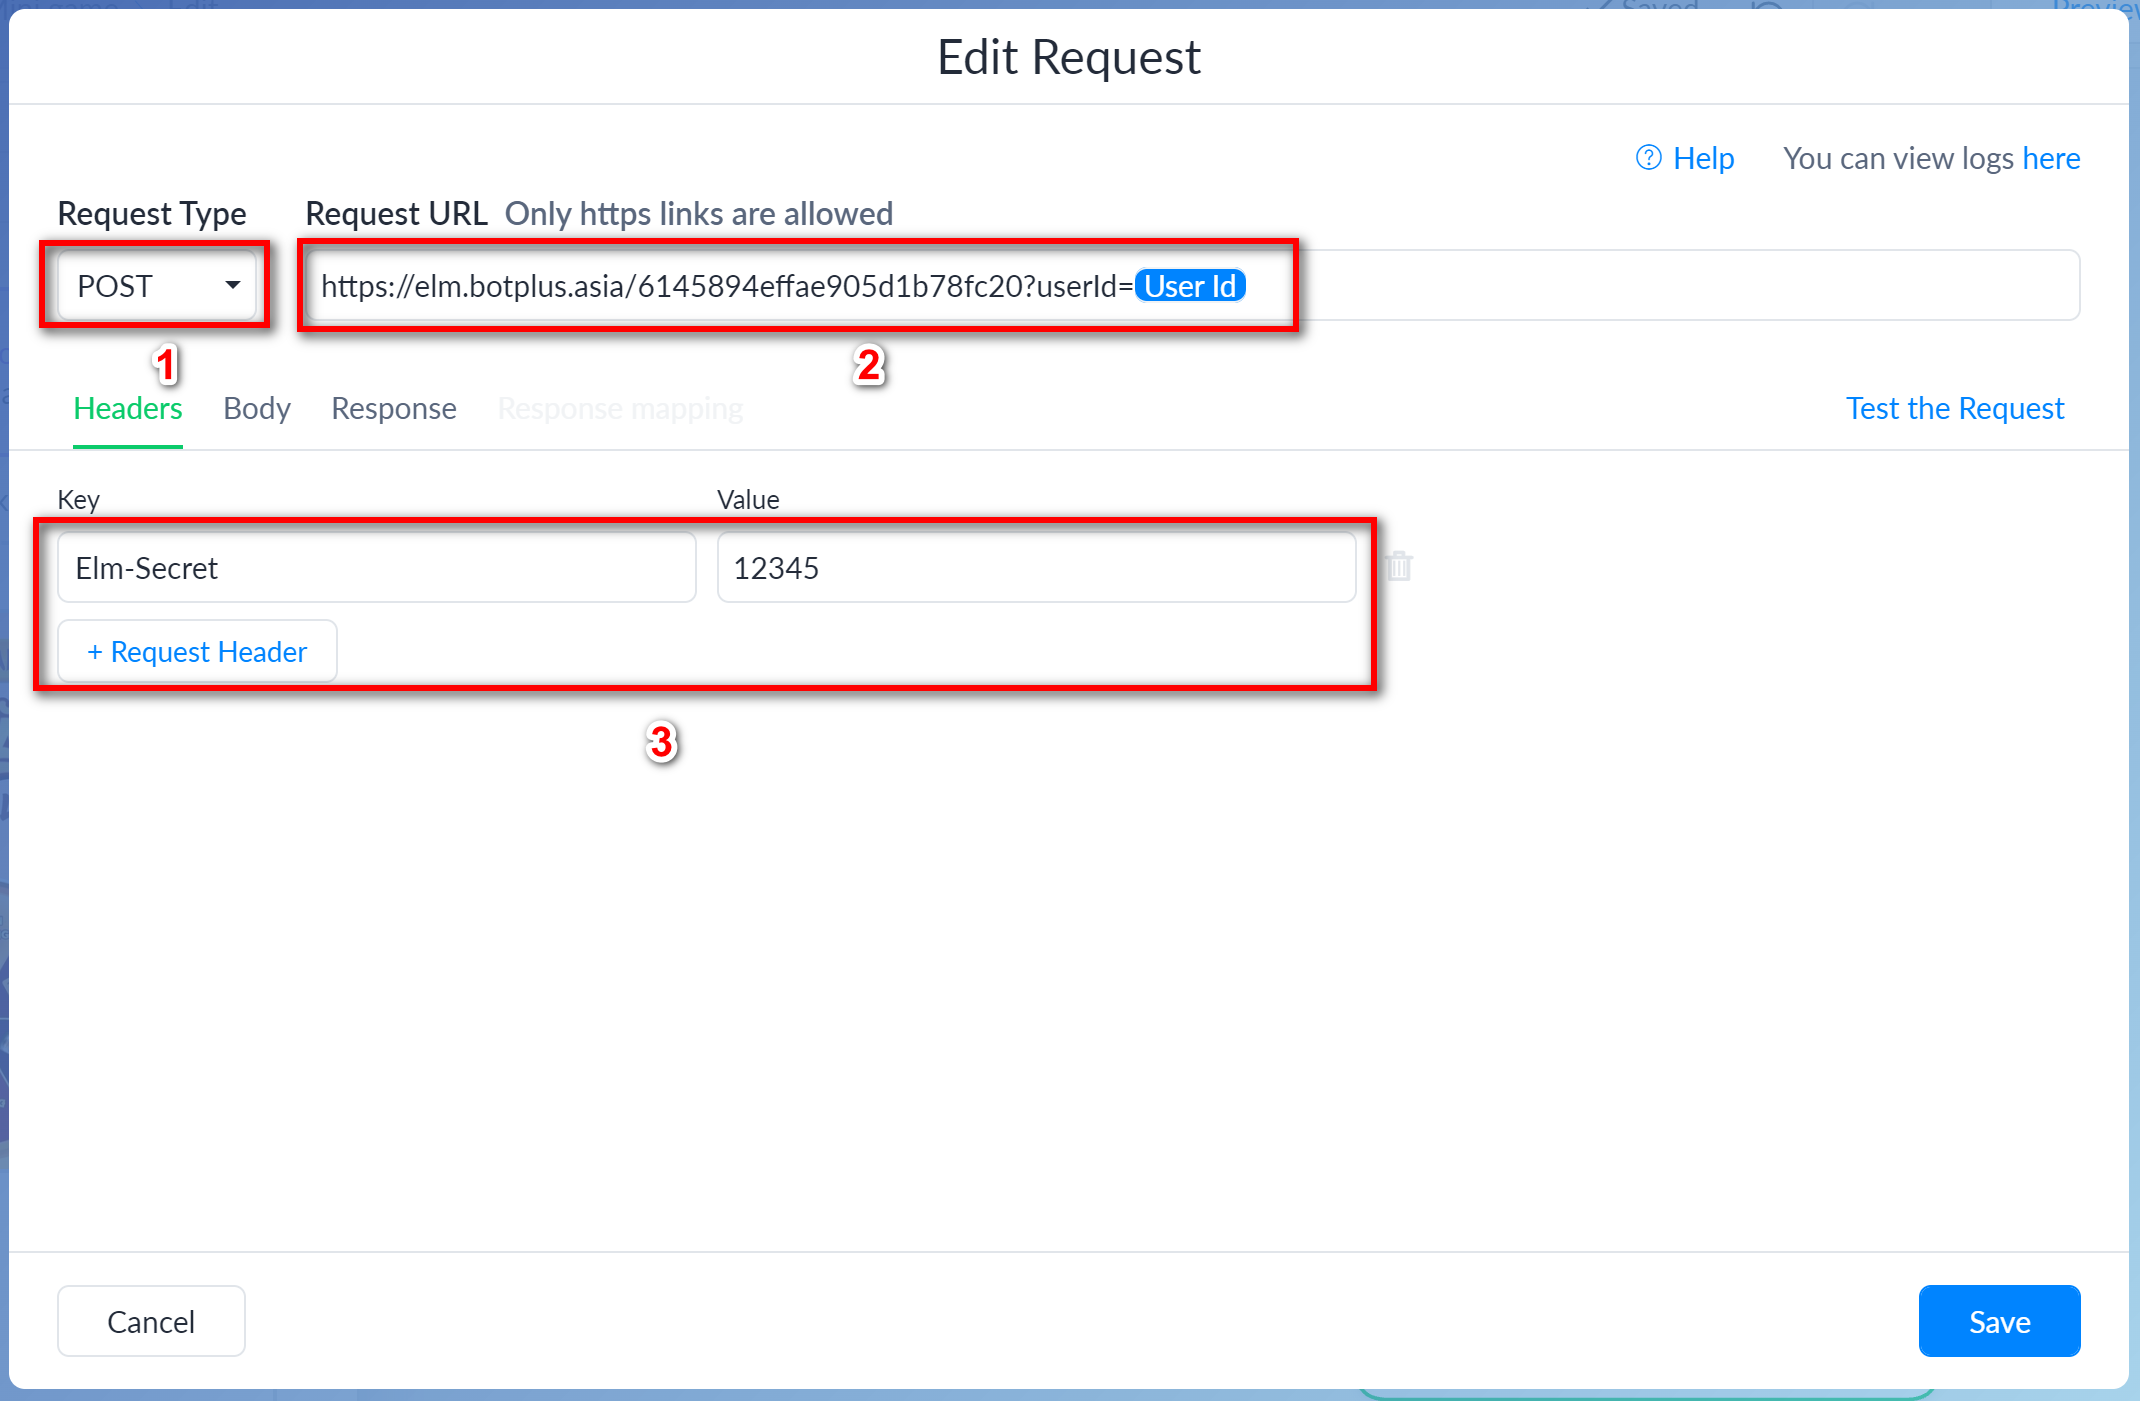
Request Type: Chọn cấu hình POST
Dán mã vừa copy trên Plugin Botplus.io vào phần Request URL của thẻ Dynamic trên Manychat.
Nhấn +Request Header và thêm giá trị Elm-Secret vào phần Key. Trong phần value bạn copy mã Secret vừa tạo trên plugin ở bước 6 và dán mã đó vào phần value
Chuyển sang tab Body và co đoạn bên dưới dán vào Request Body
Giá trị số 1 bên trên là số lượt quay truyền lên cho người chơi, bạn có thể sửa giá trị đó là một số khác tùy theo giá trị lượt chơi mà bạn muốn truyền. Bạn có thể truyền 1 User Field là giá trị số lượt chơi cho khách hàng.
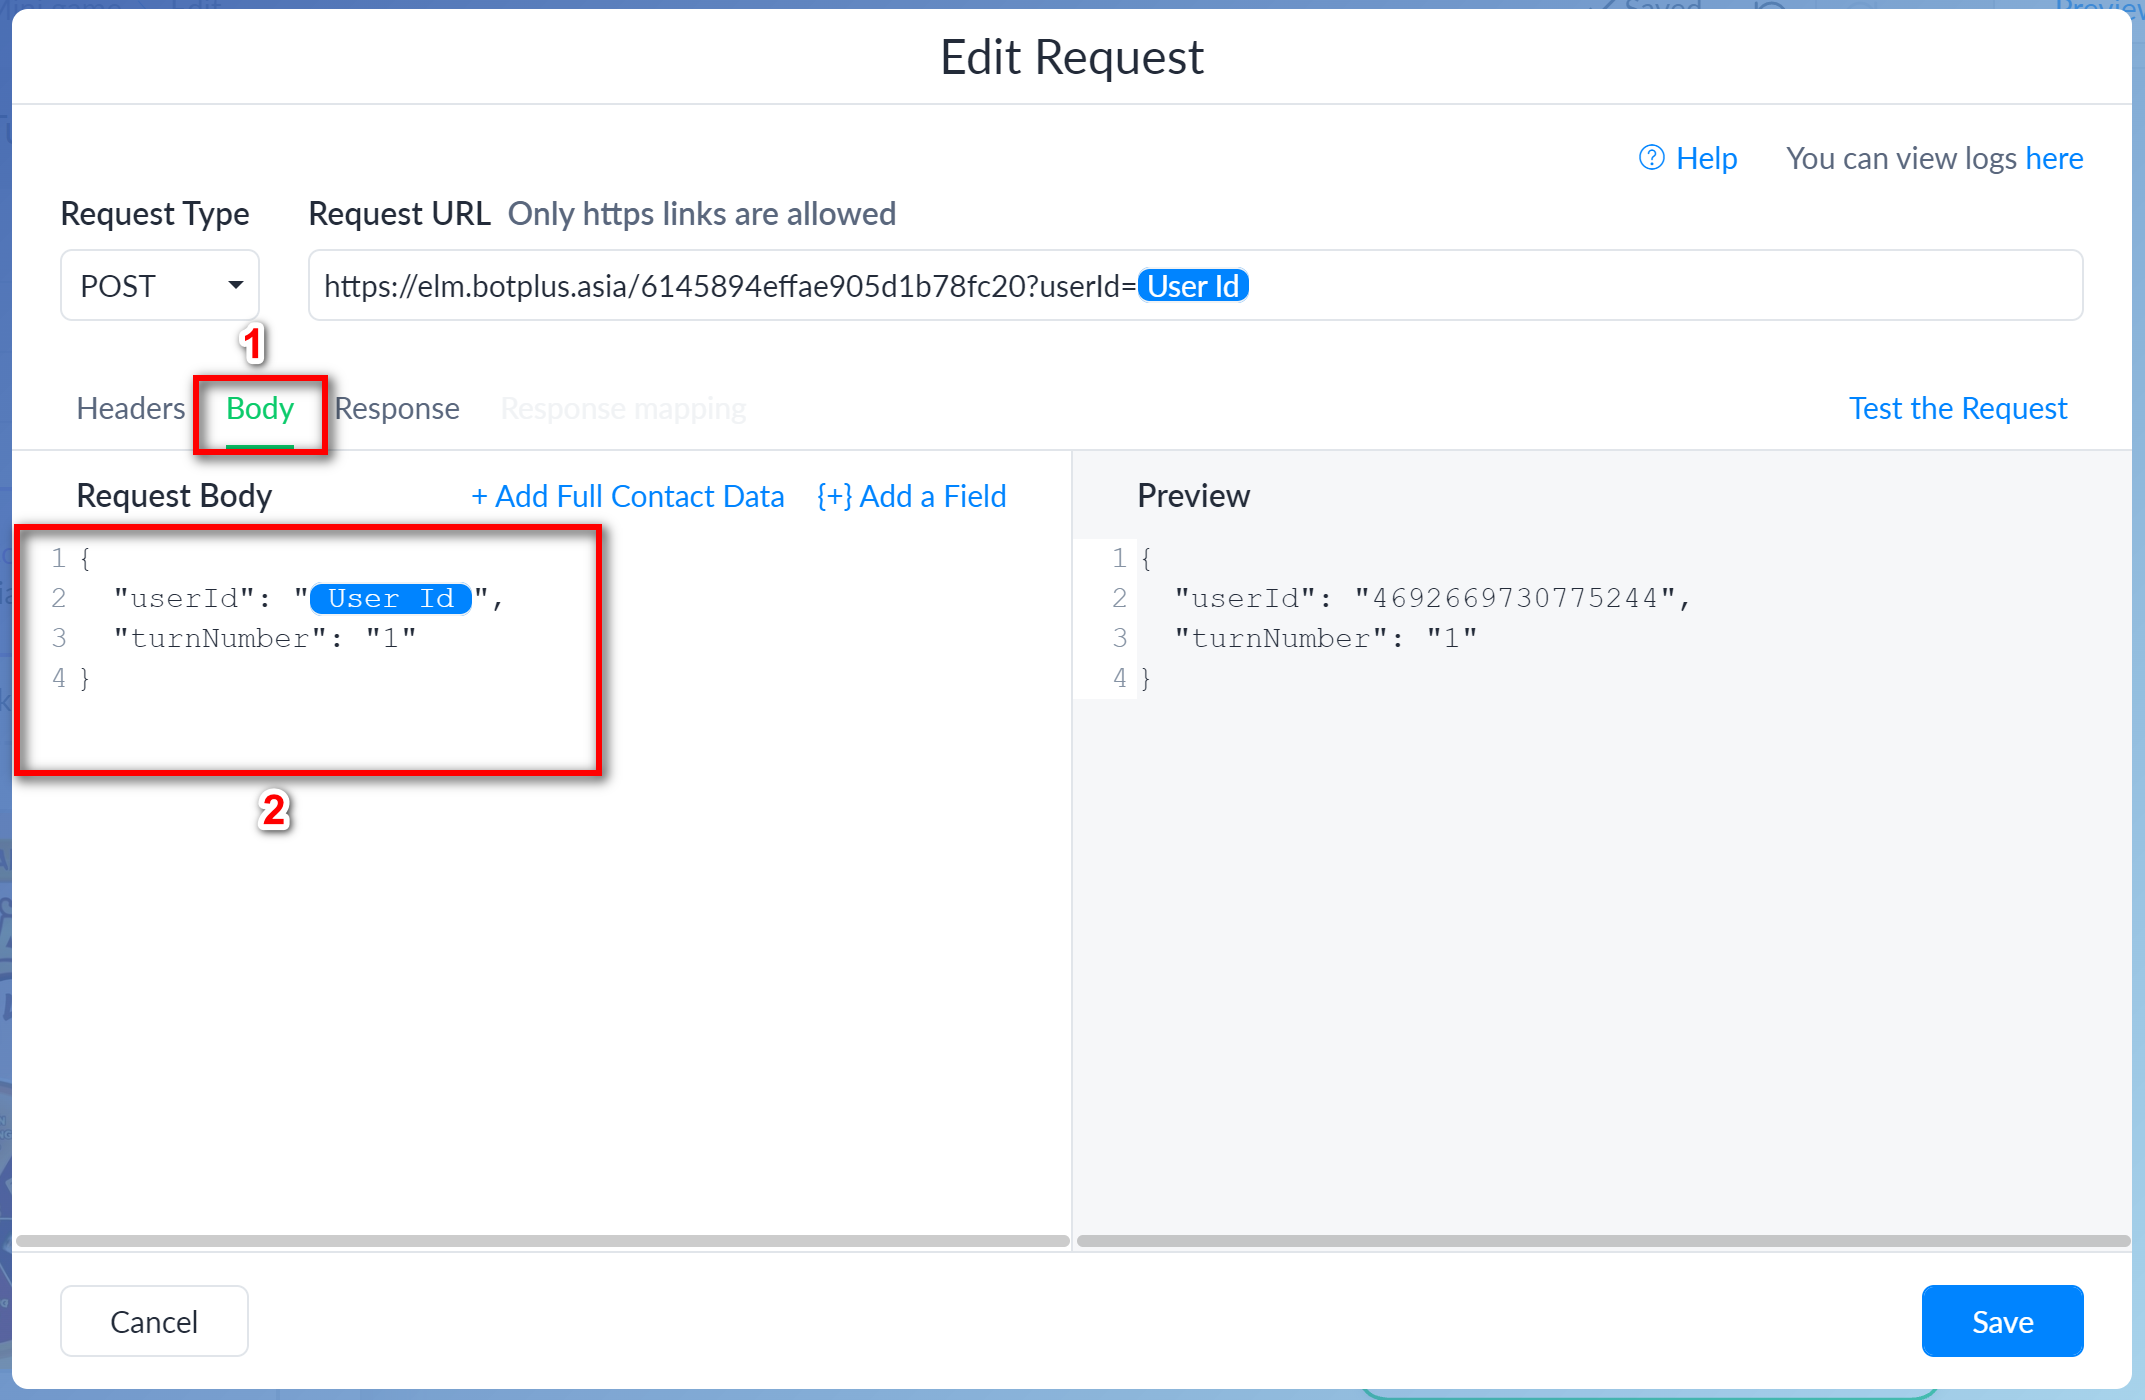
Sau khi câu hình xong bạn nhấn Save để lưu lại cấu hình thẻ.
7.2: Kết nối link vào button.
Tạo thẻ Gallery hoặc thẻ Text để hiển thị nội dung cho khách hàng. Chọn Add button để tạo button kết nối.
Bạn nhập tên button (VD: Play) sau đó chọn tab Open website và dán đường dẫn copy ở bước 6 vào.
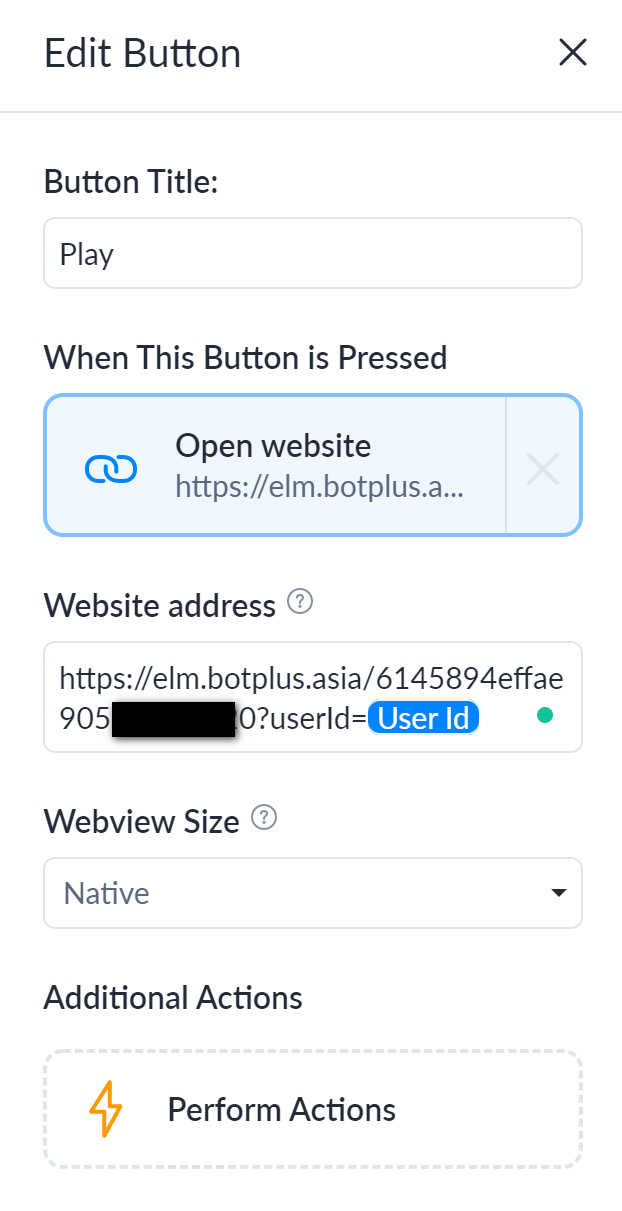
Nhấn Done và kịch bản chatbot vừa tạo.
Last updated