Manychat
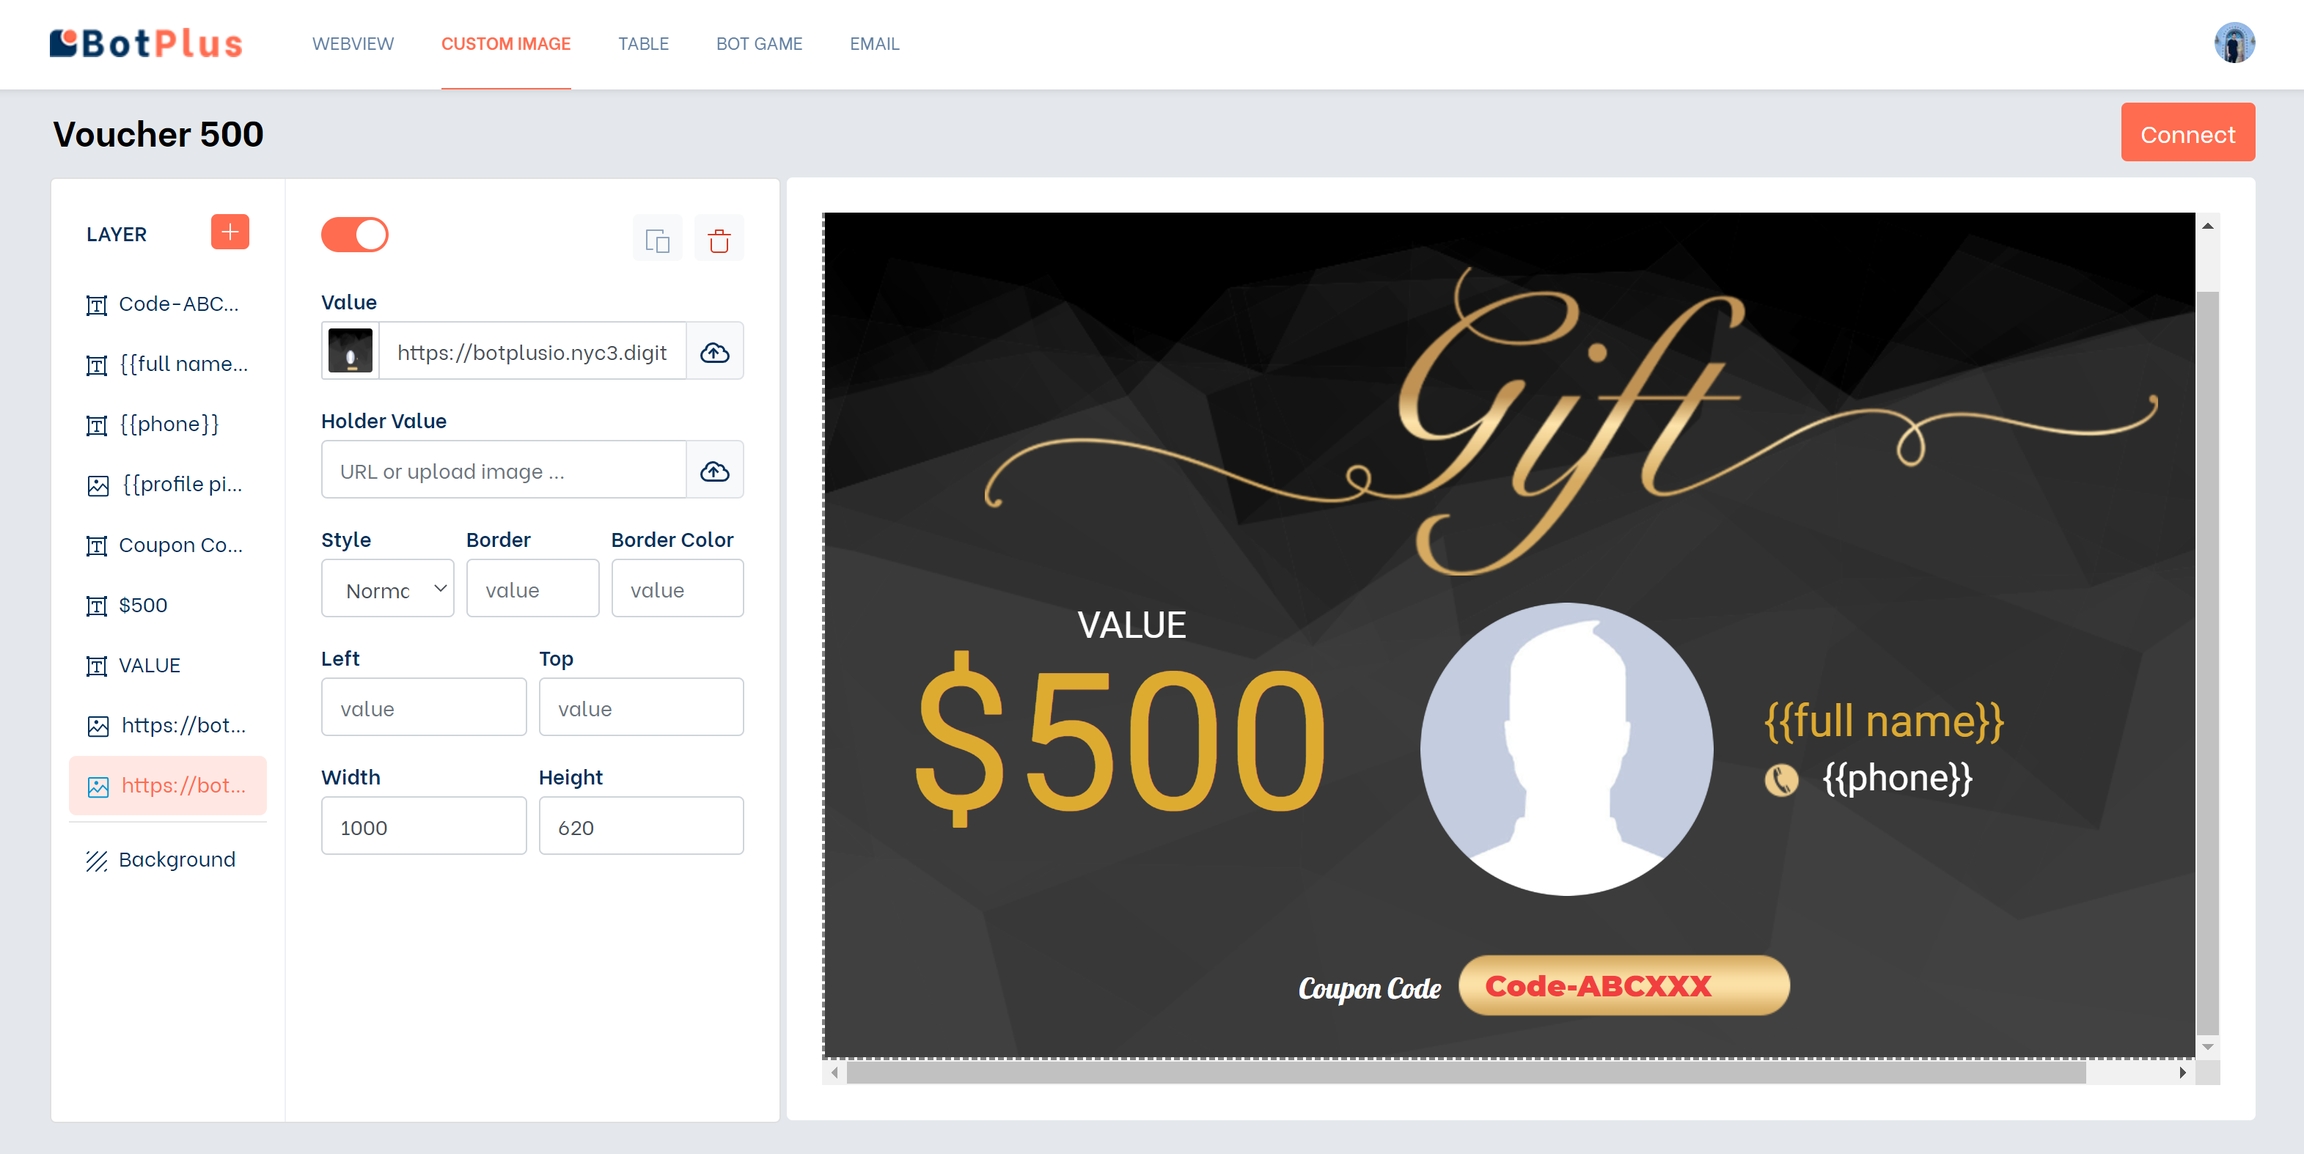
Step 1: To be able to integrate with Manychat, you select to connect
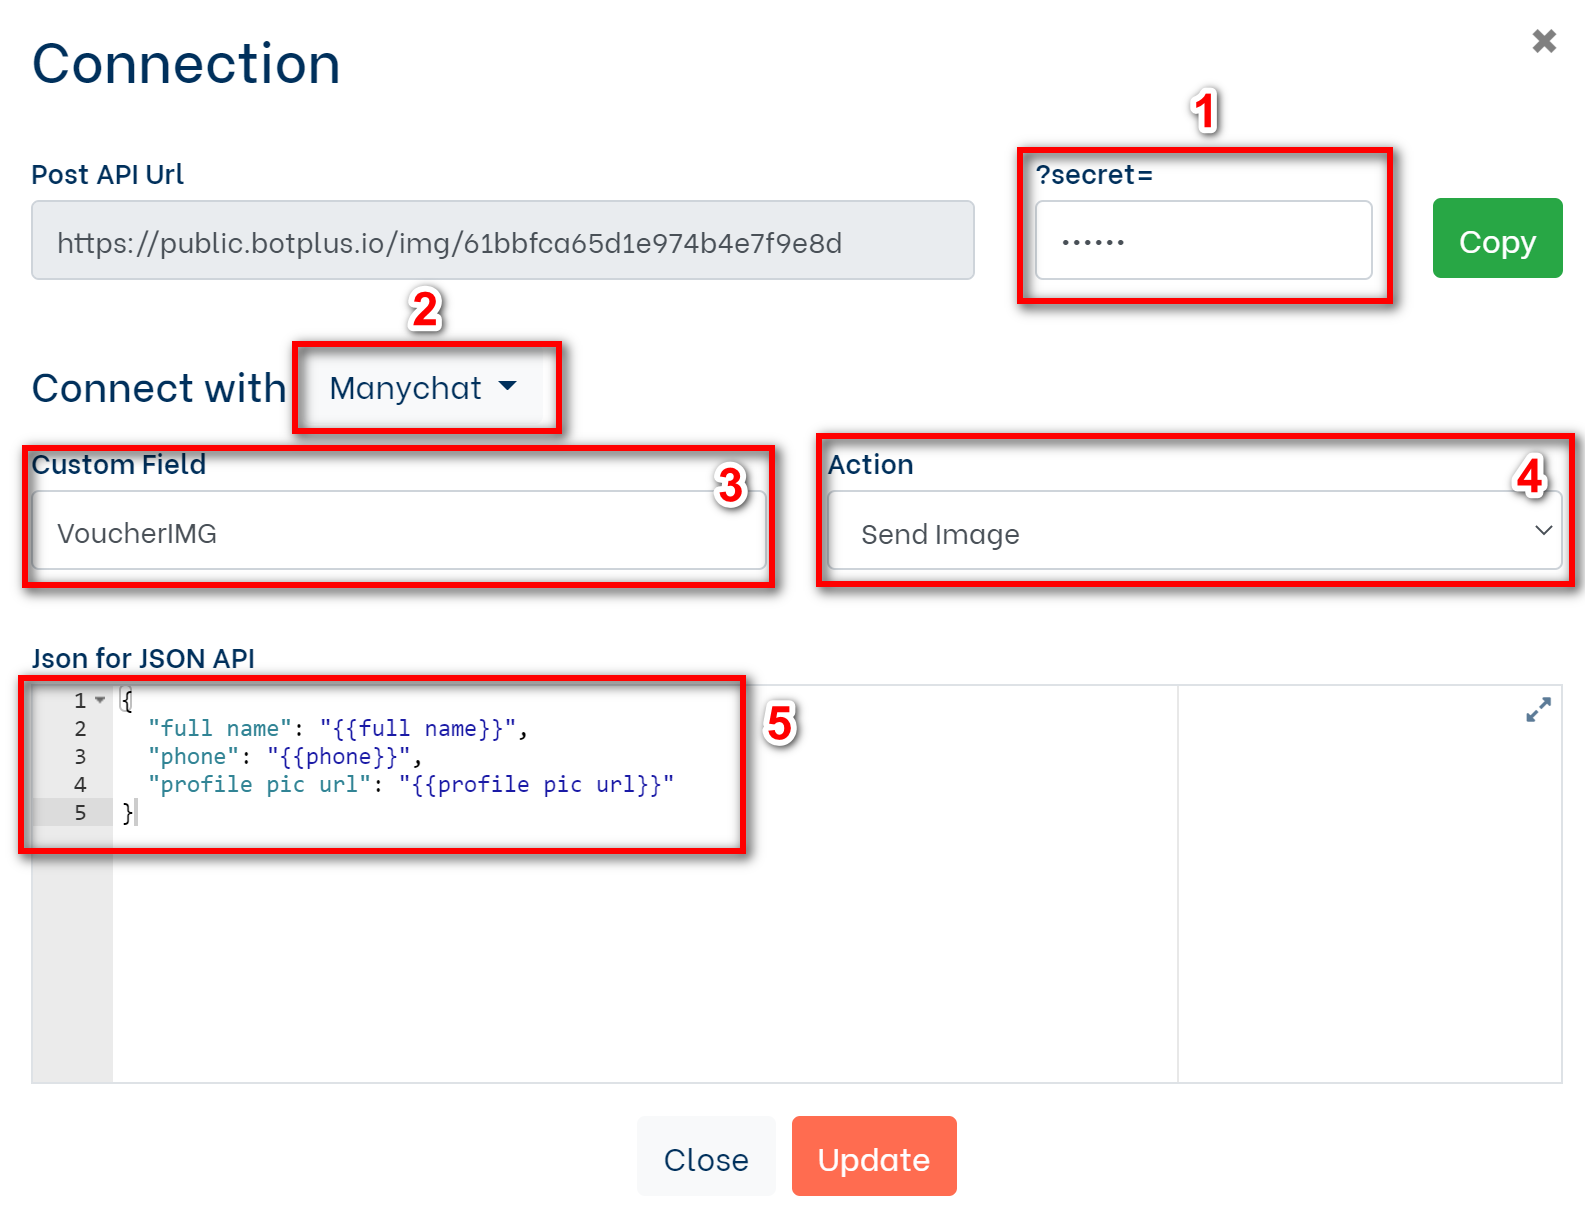
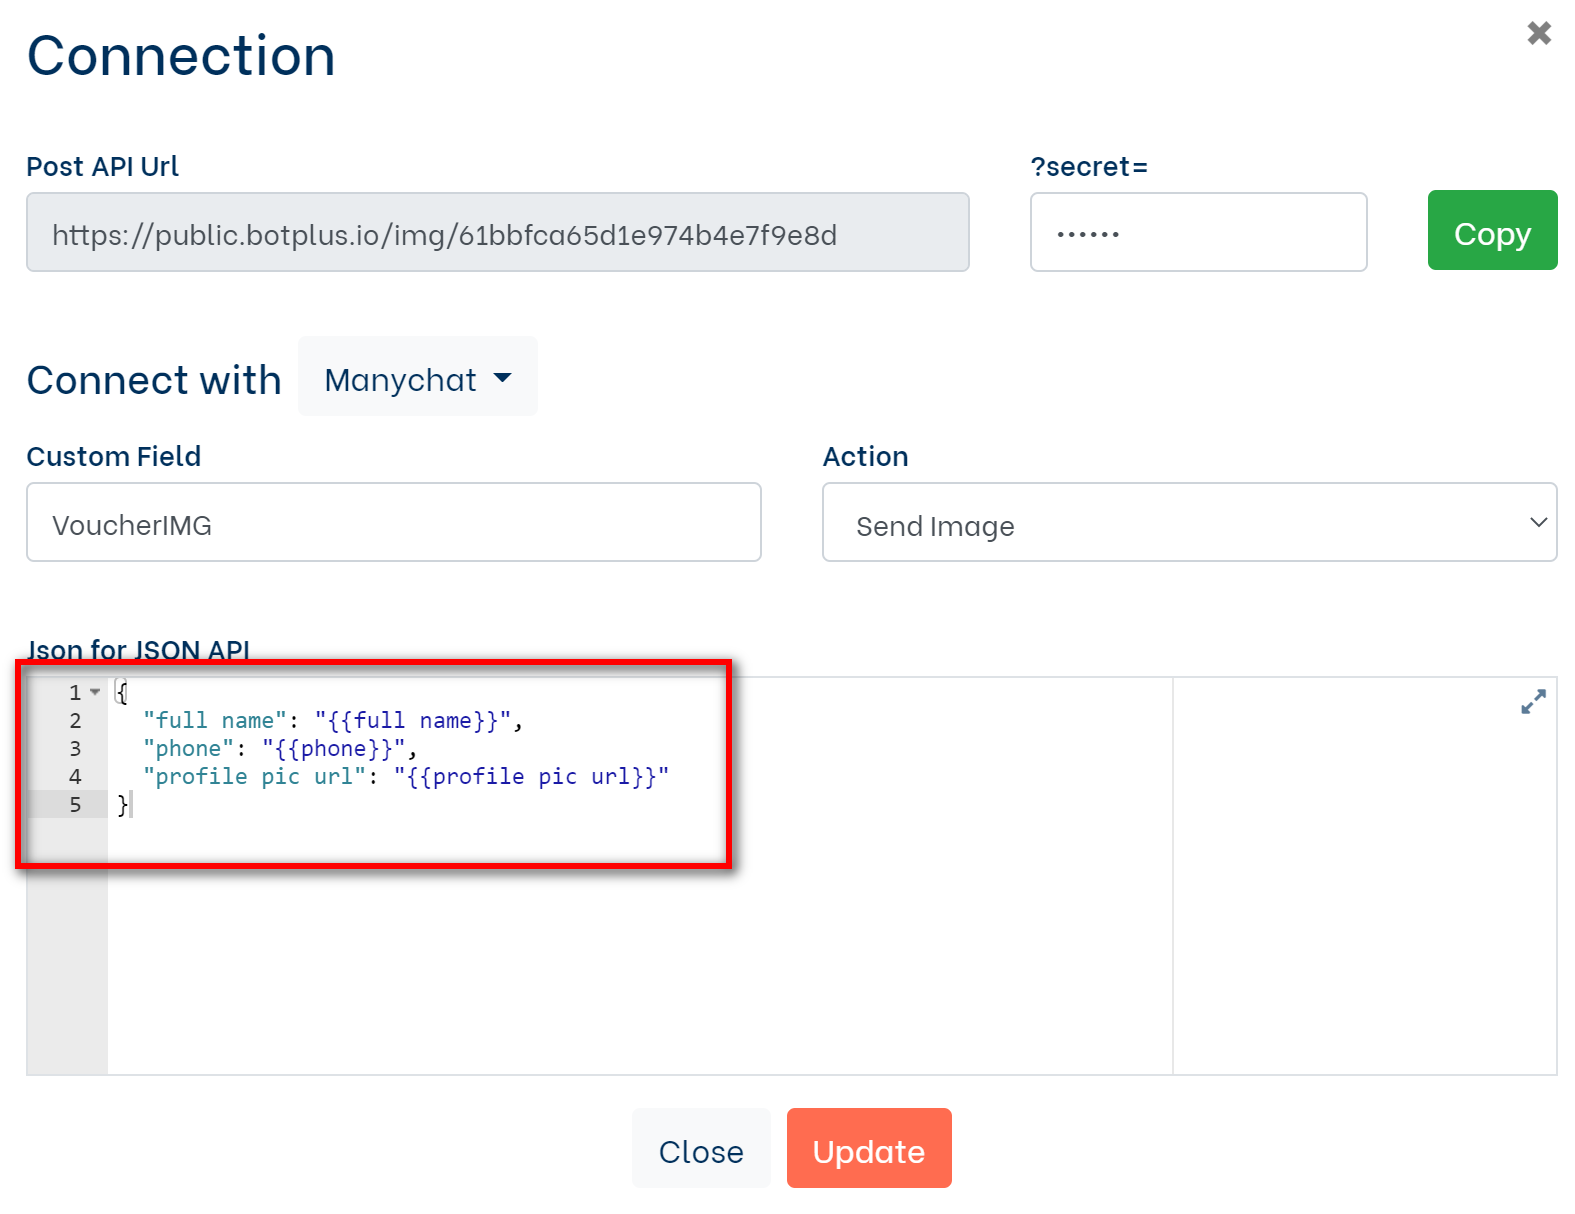
Step 2: This is the screen used to configure the connection:
1: Enter any code used as a security code in Secret.
2: Select Manychat in dropdown list
3: Custom Field: Enter the Custom Field name to use in Manychat. This is the Custom Field that will save the image link created with the plugin.
4: Action: Select the appropriate action you want to use. I choose Send Image to send photos directly to customers.
5: JSON code is used to connect and transfer data from Manychat to the plugin on botplus.io
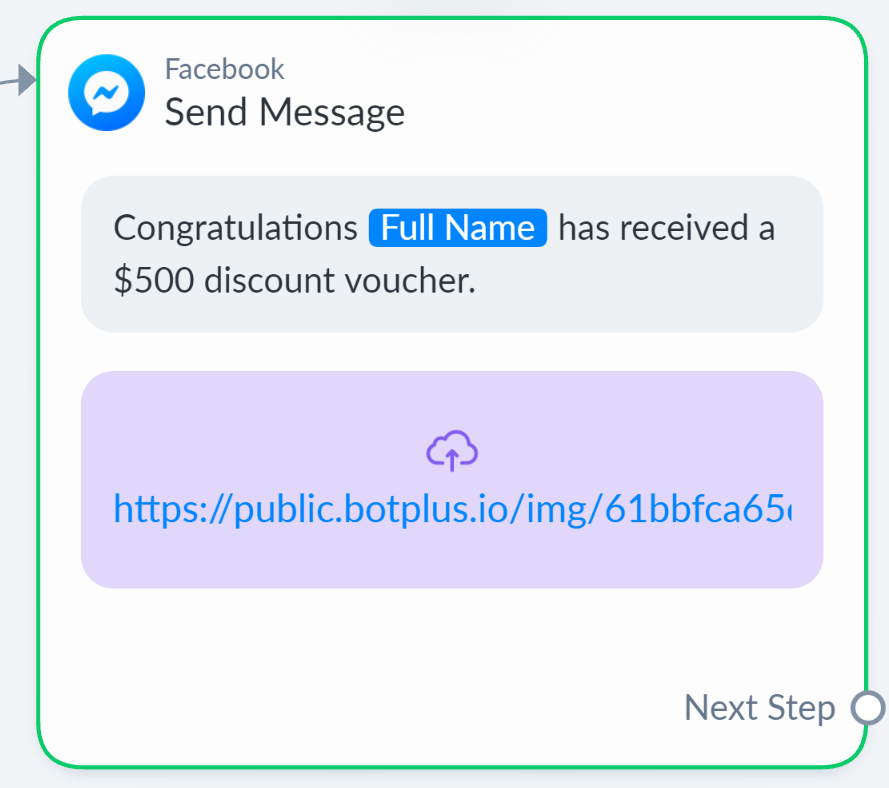
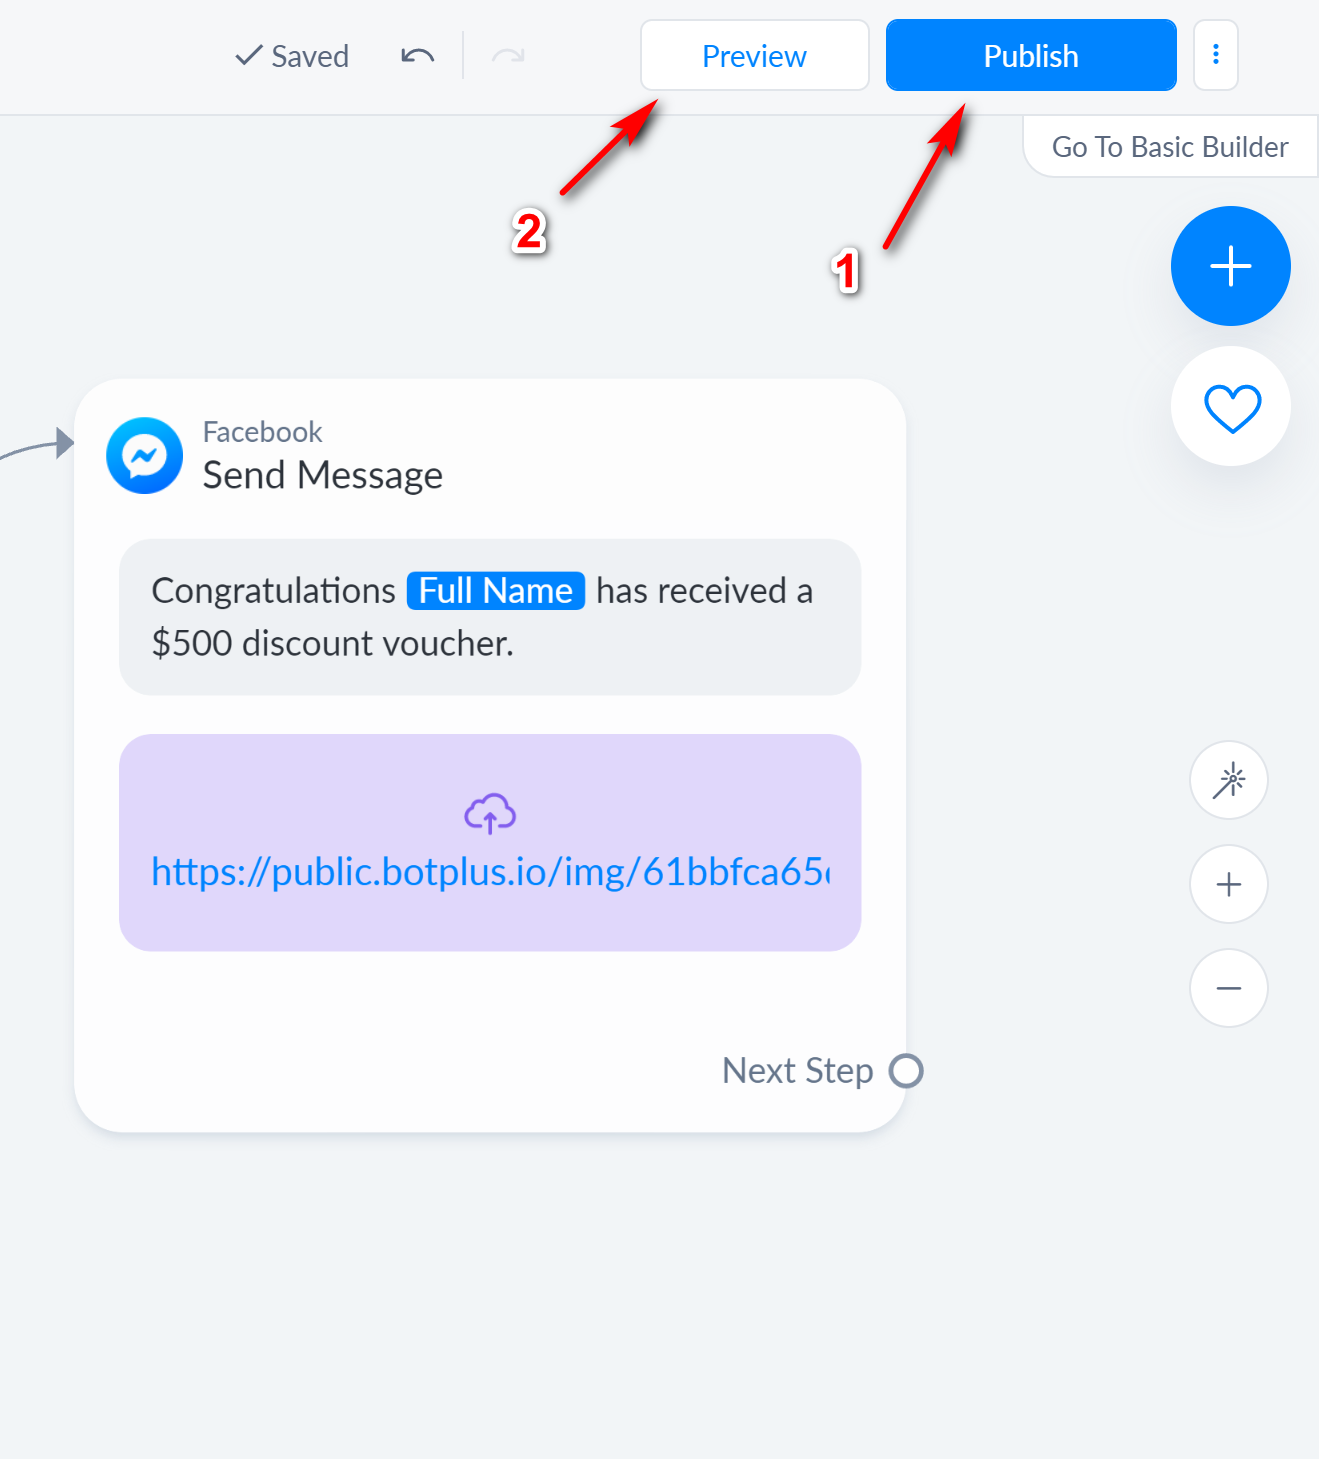
Bước 3: In Manychat, create a block and feature cards including 1 Text card to display content with customers and 1 Dynamic card to connect.
Bước 4: Dynamic card configuration
After setting up the connection on botplus.io, click Update to save the configuration and select Copy to manually copy the generated API with the security code.
After copying your code into Dynamic on Manychat and paste it in the Request URL section.
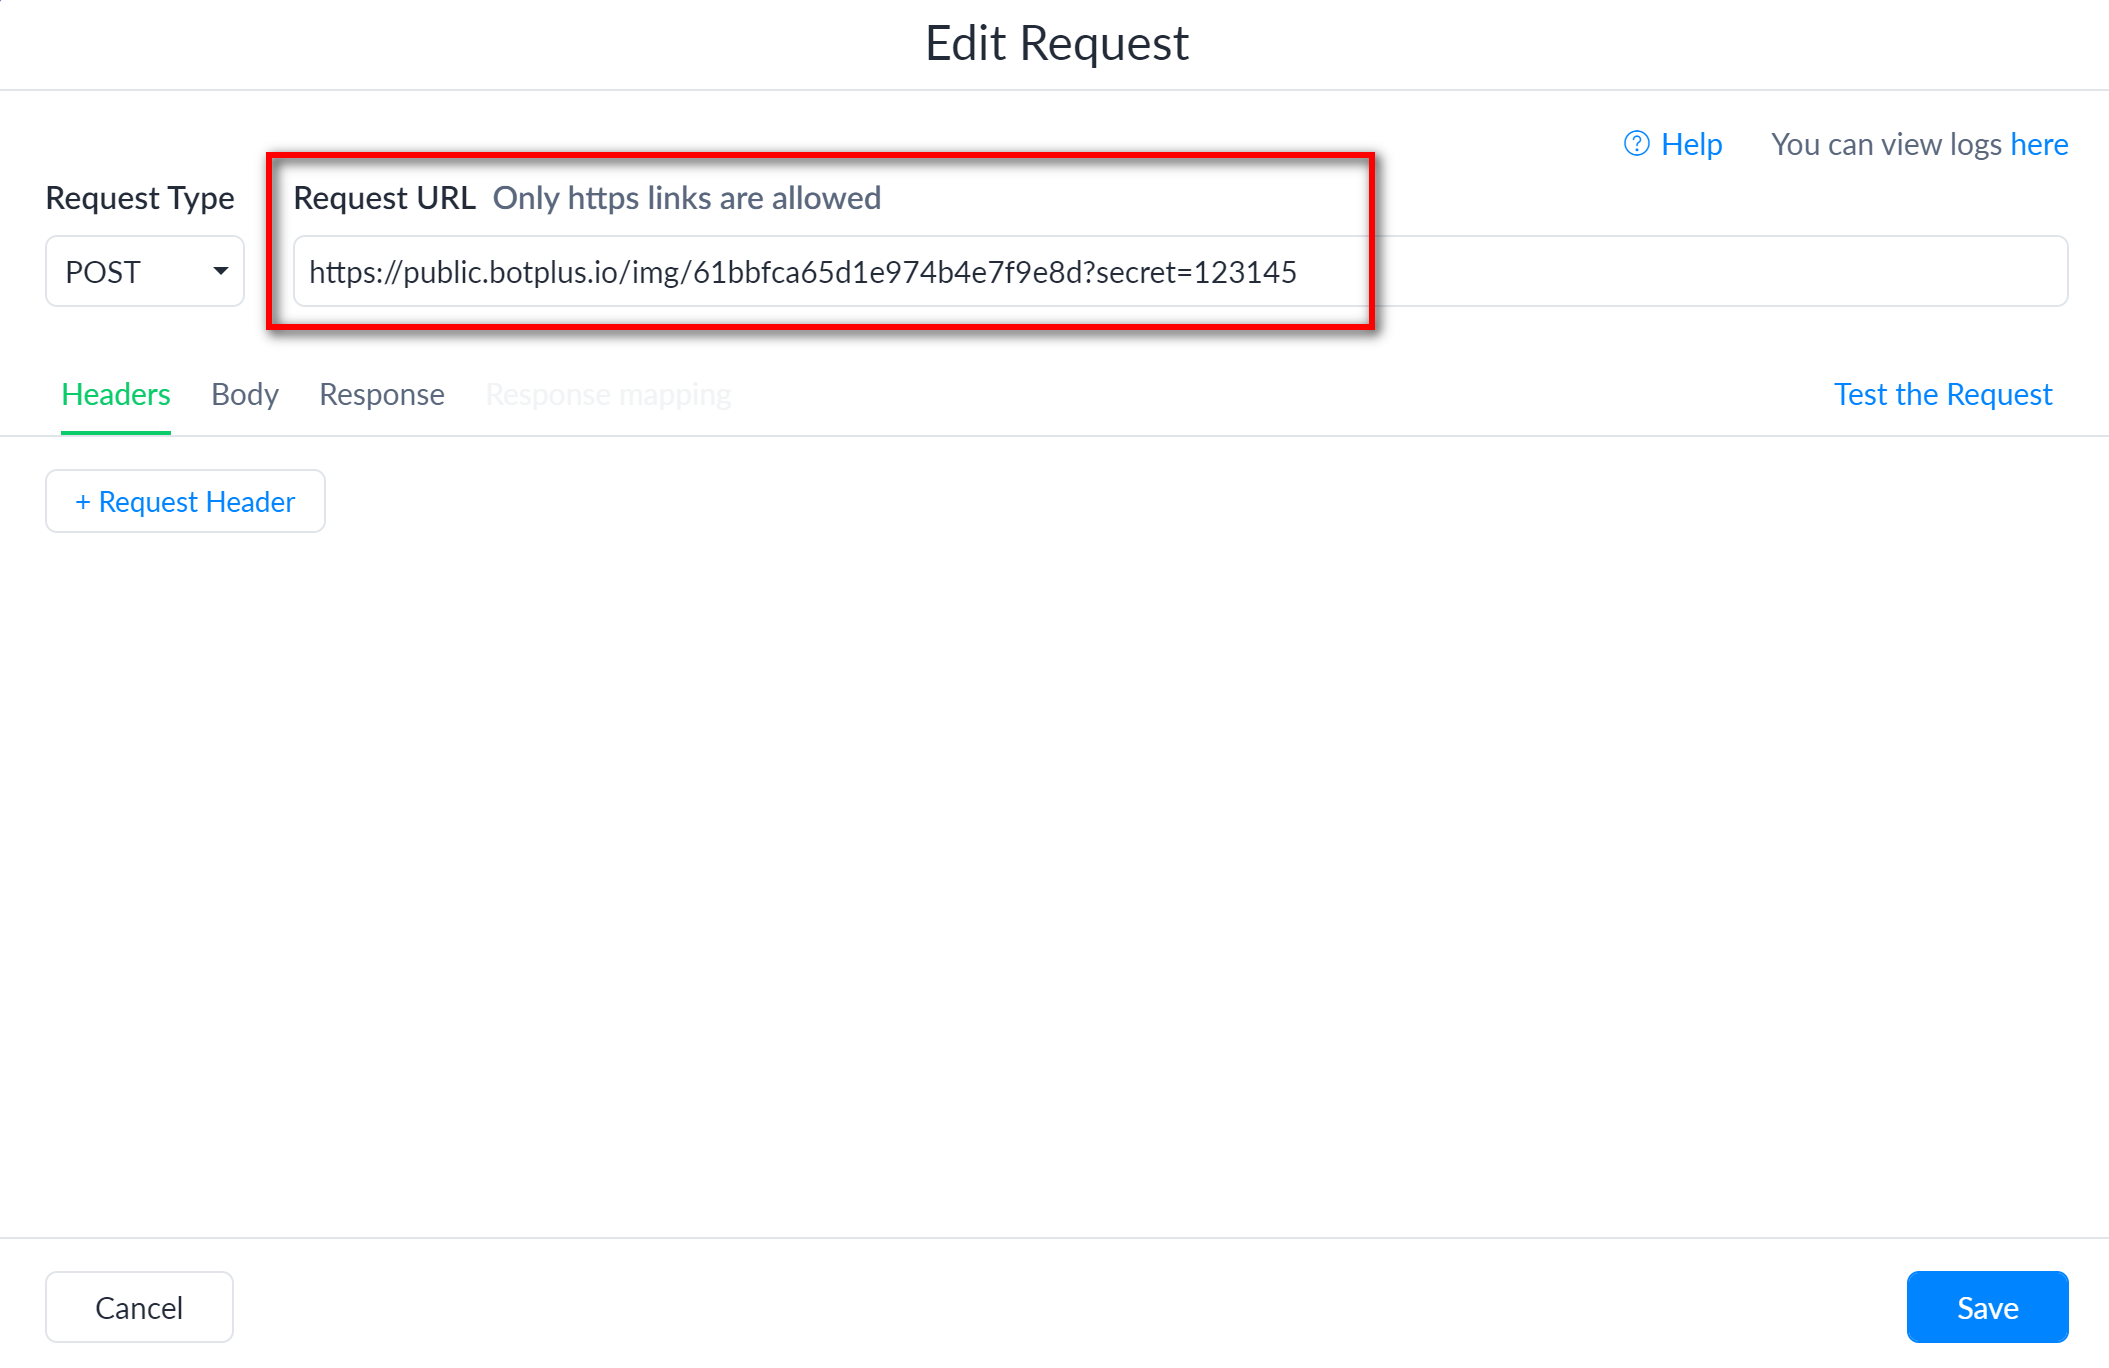
After copying the API link, go back to the plugin on botplus and copy the "Json for JSON API" part to connect.
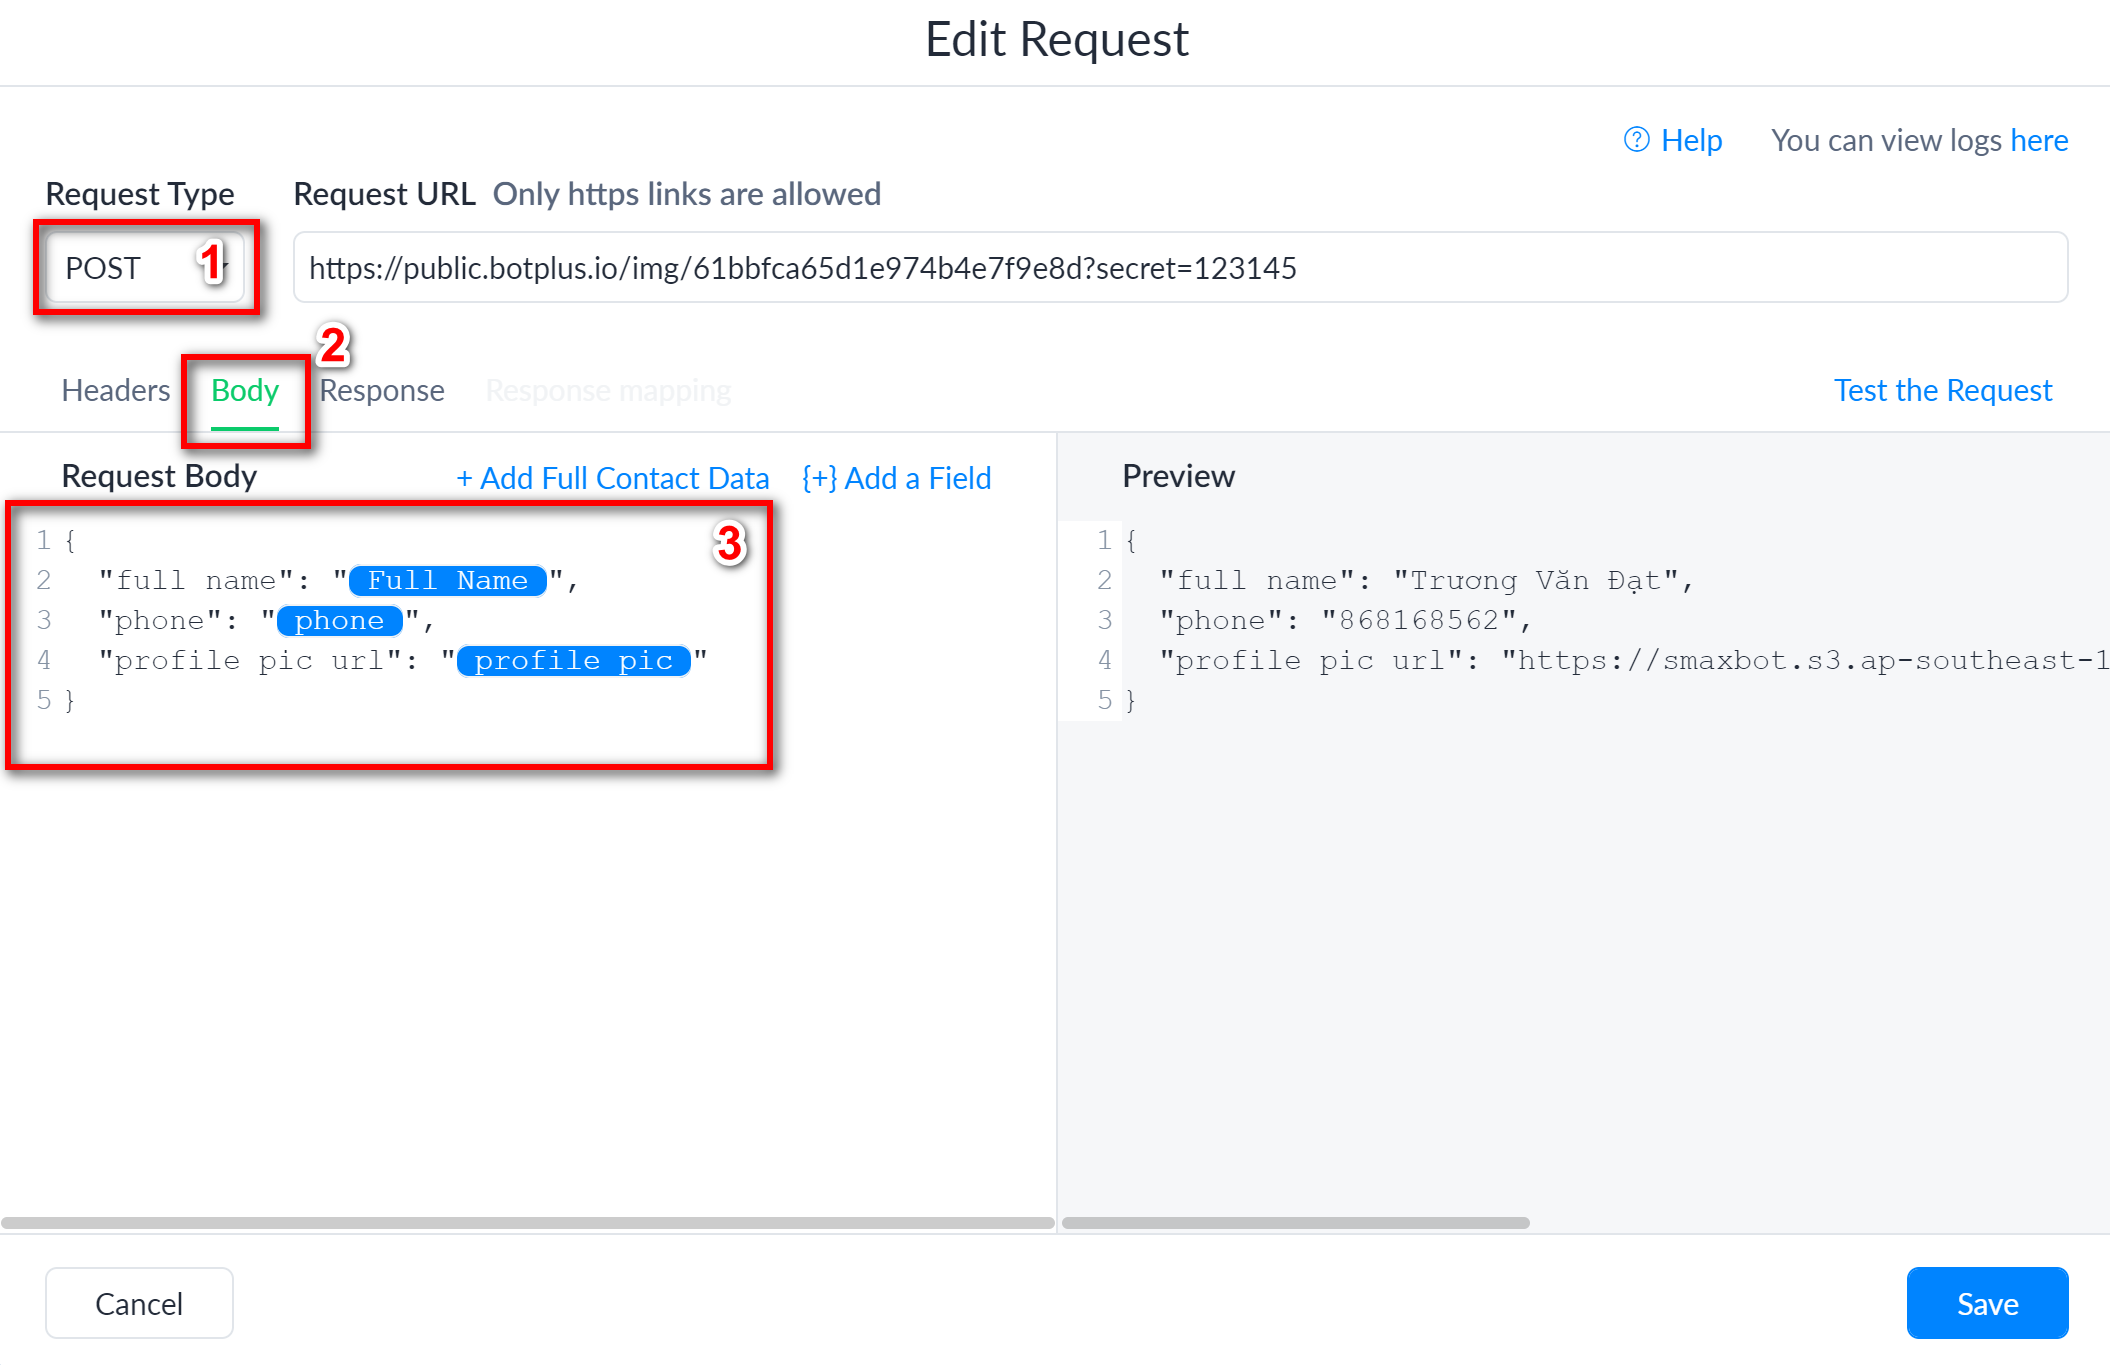
Go back to the Dynamic card and continue the installation according to the instructions below.
1: Request Type: Select POST
2: Select Body
3: Paste the content just copied on the plugin into the Request Body and click Save to save the settings
Step 5: After the installation is complete, you Public Fowl and test the installed bot.
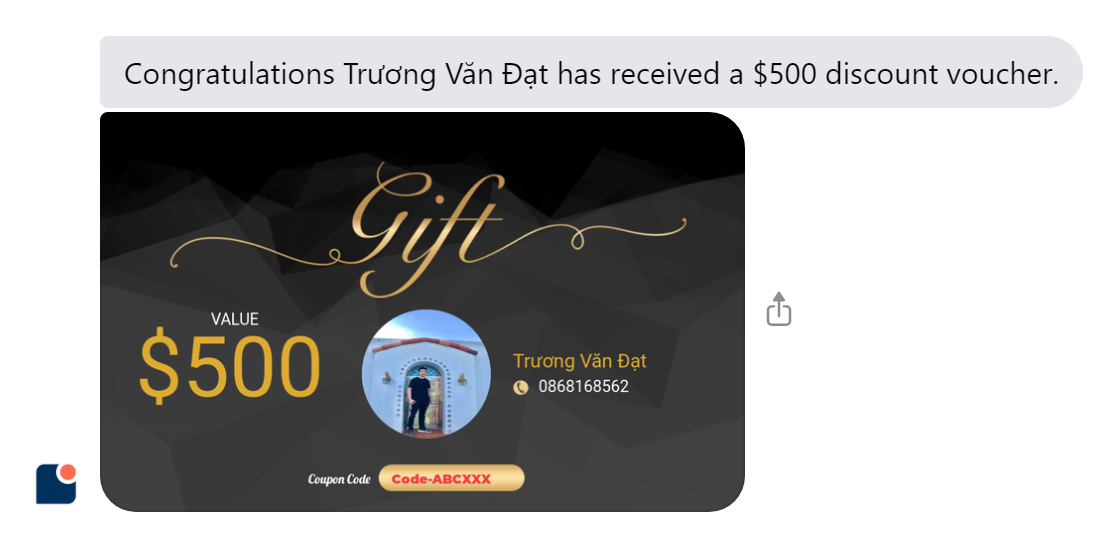
After clicking Preview, the bot will send a personalized content and image to the customer.
Last updated