Manychat
Step 1: In Manychat you create 2 flows:
Flow 1: Flow contains a button to enable webview for customers to use. When the customer presses the button, it will be connected to the webview plugin on Botplus.io
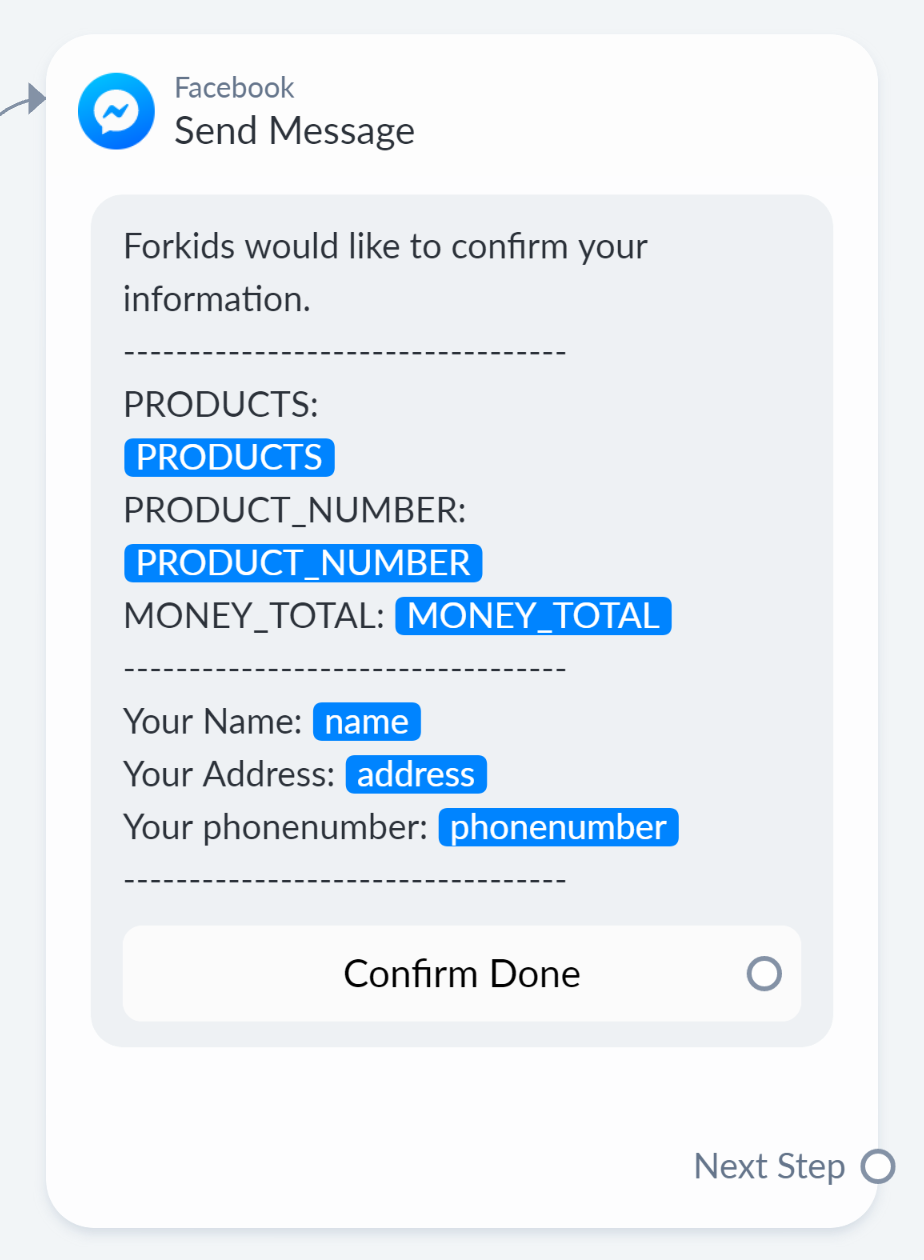
Flow 2: This flow is used to confirm customer information on the chatbot. After the customer completes the information on the webview and clicks submit, flow 2 will be activated.

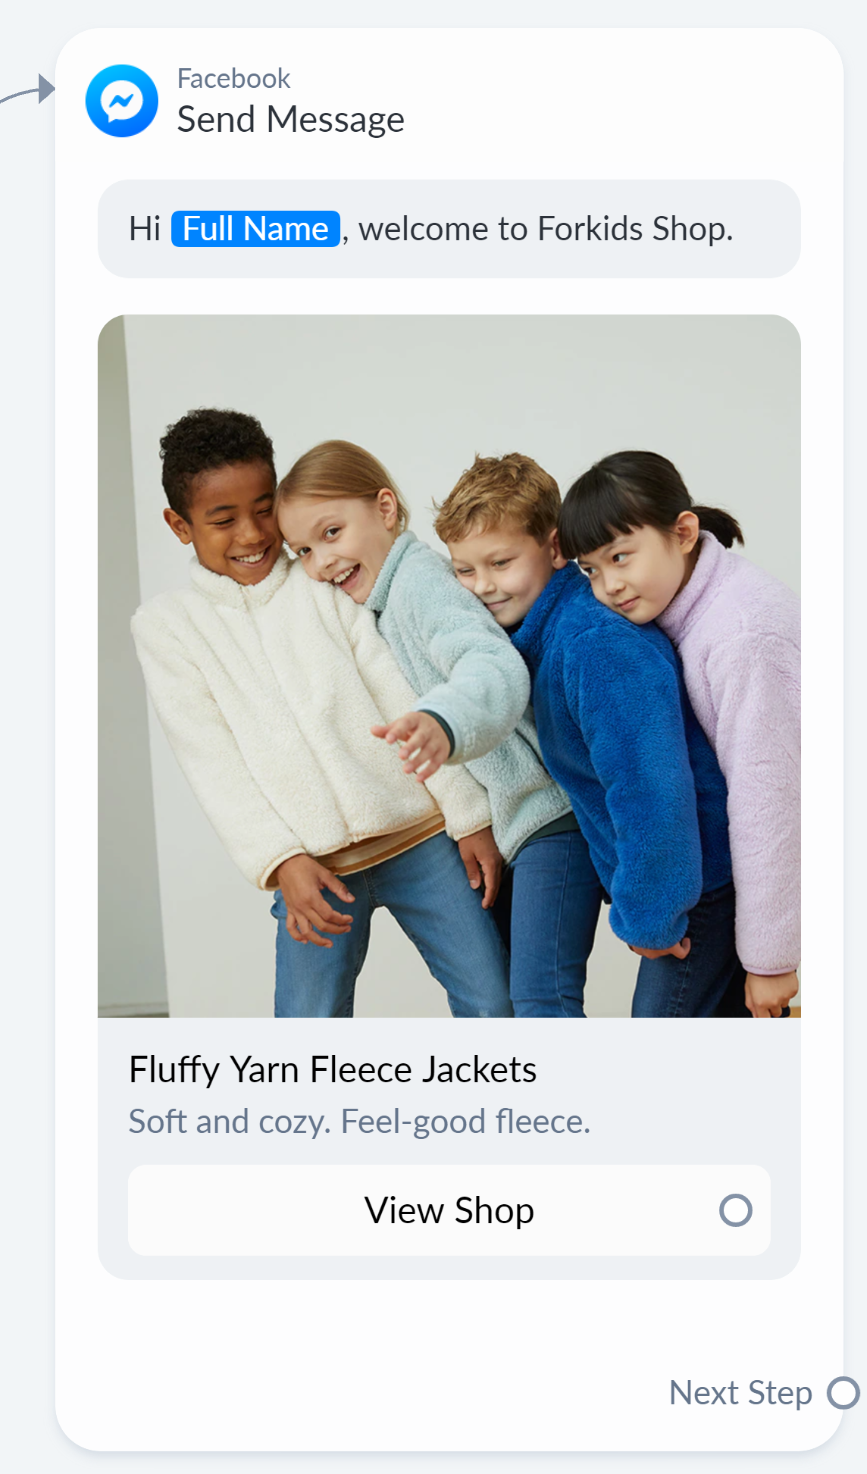
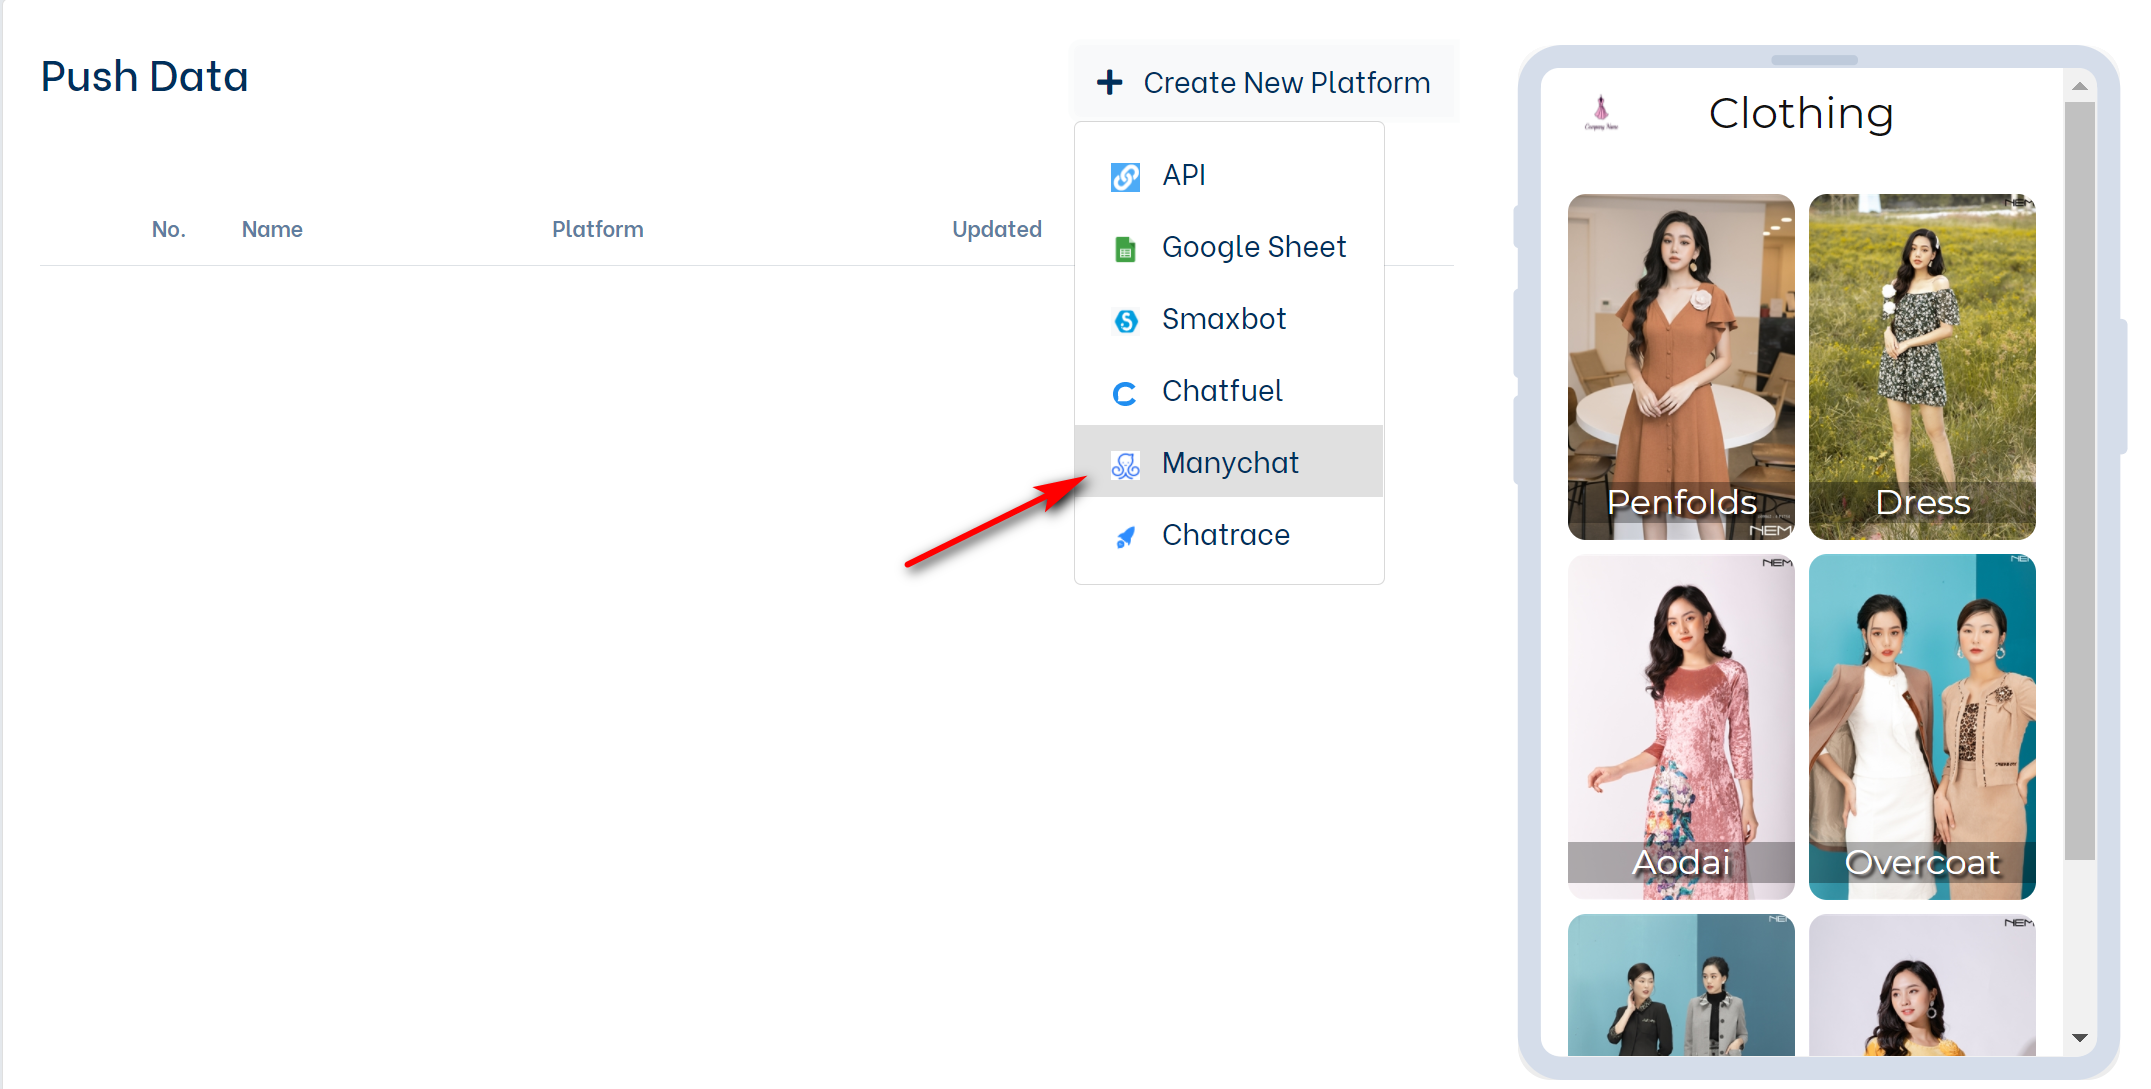
Step 2: On botplus.io you access the Push data menu then click to "Create New Platform" and select Manychat in the drop-down list.
Step 3: This is the part to configure the connection of Webview with Manychat.
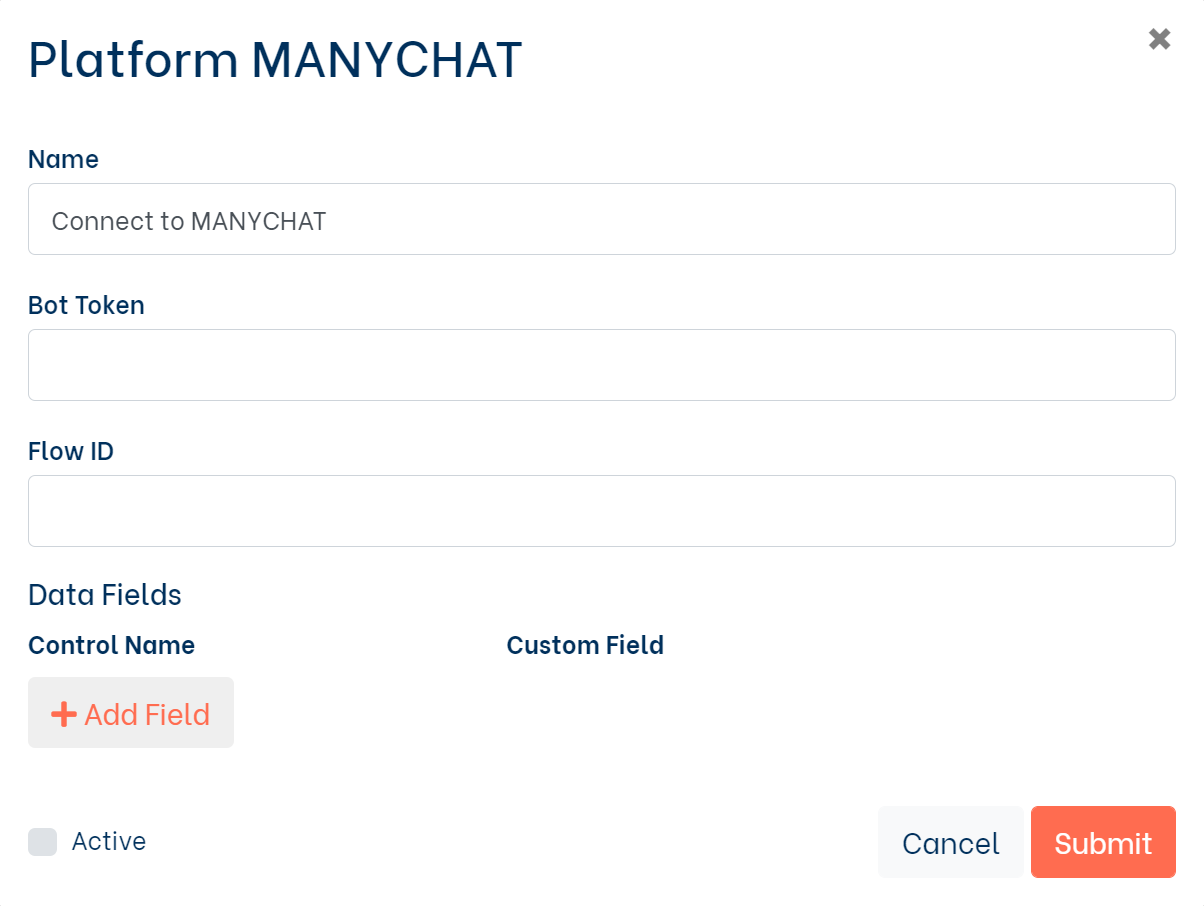
Name: Connection Name
Bot Token: Manychat Token
Flow ID: The ID of the flow reconfirms the information after the user completes it.
Data Fields: Data fields to push from bots to Chatbot
Step 4:
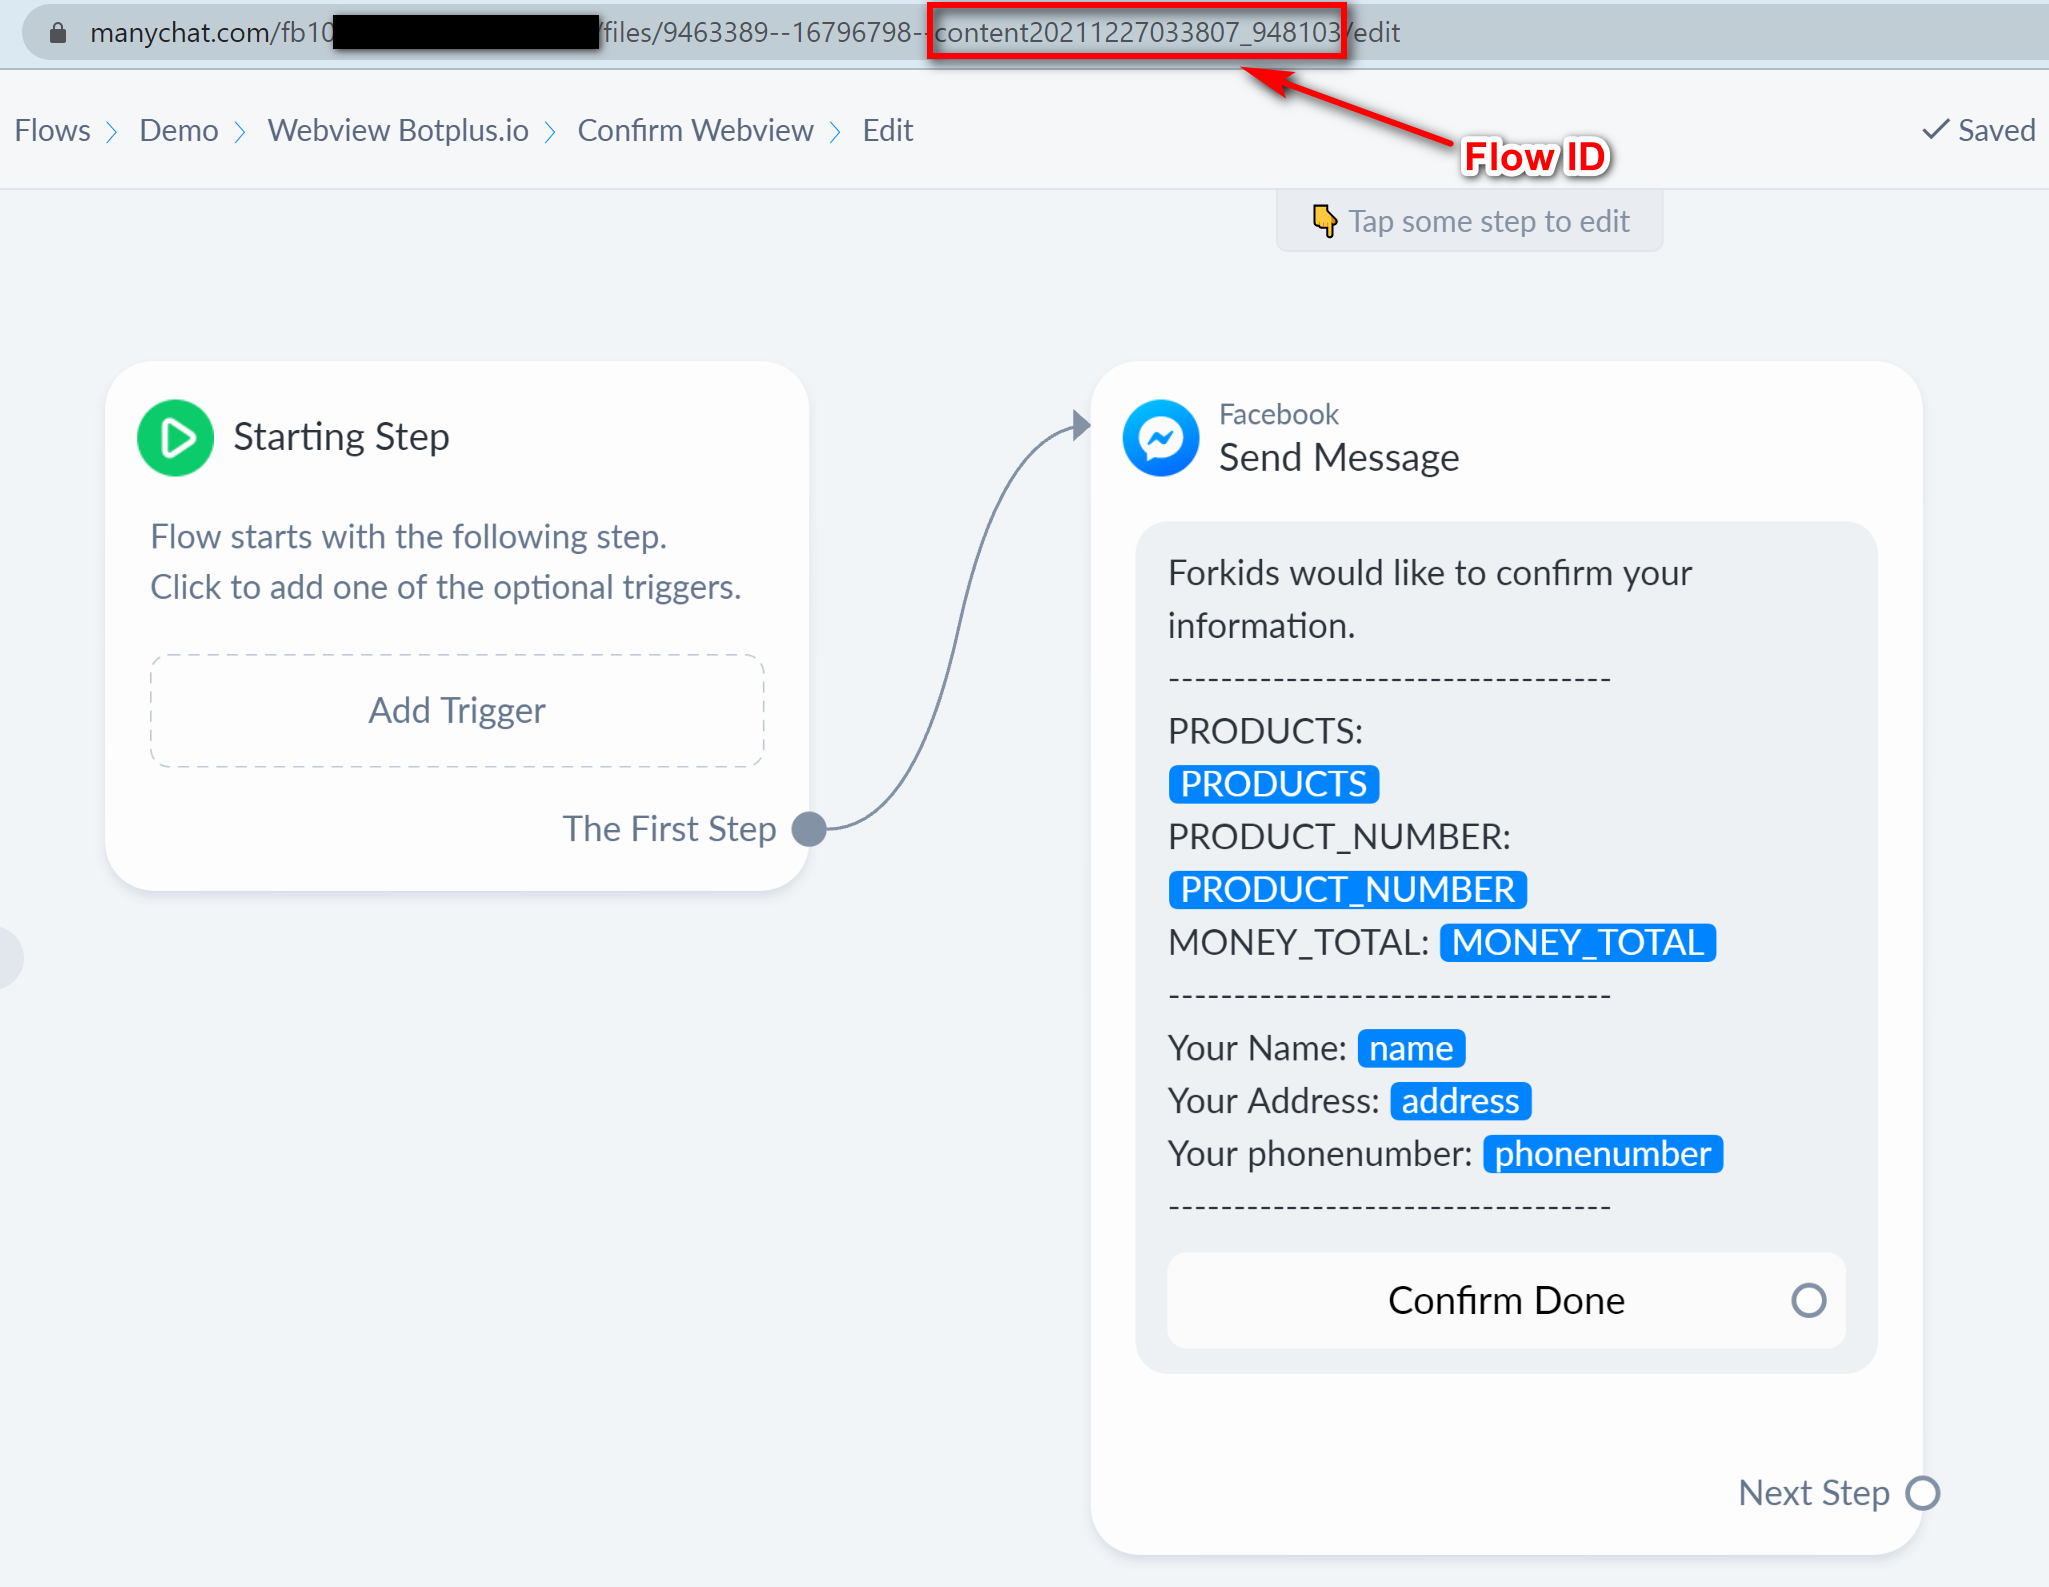
Copy the Flow ID, go to Flow 2 and copy ID in URL. See picture (starting from the content ...)
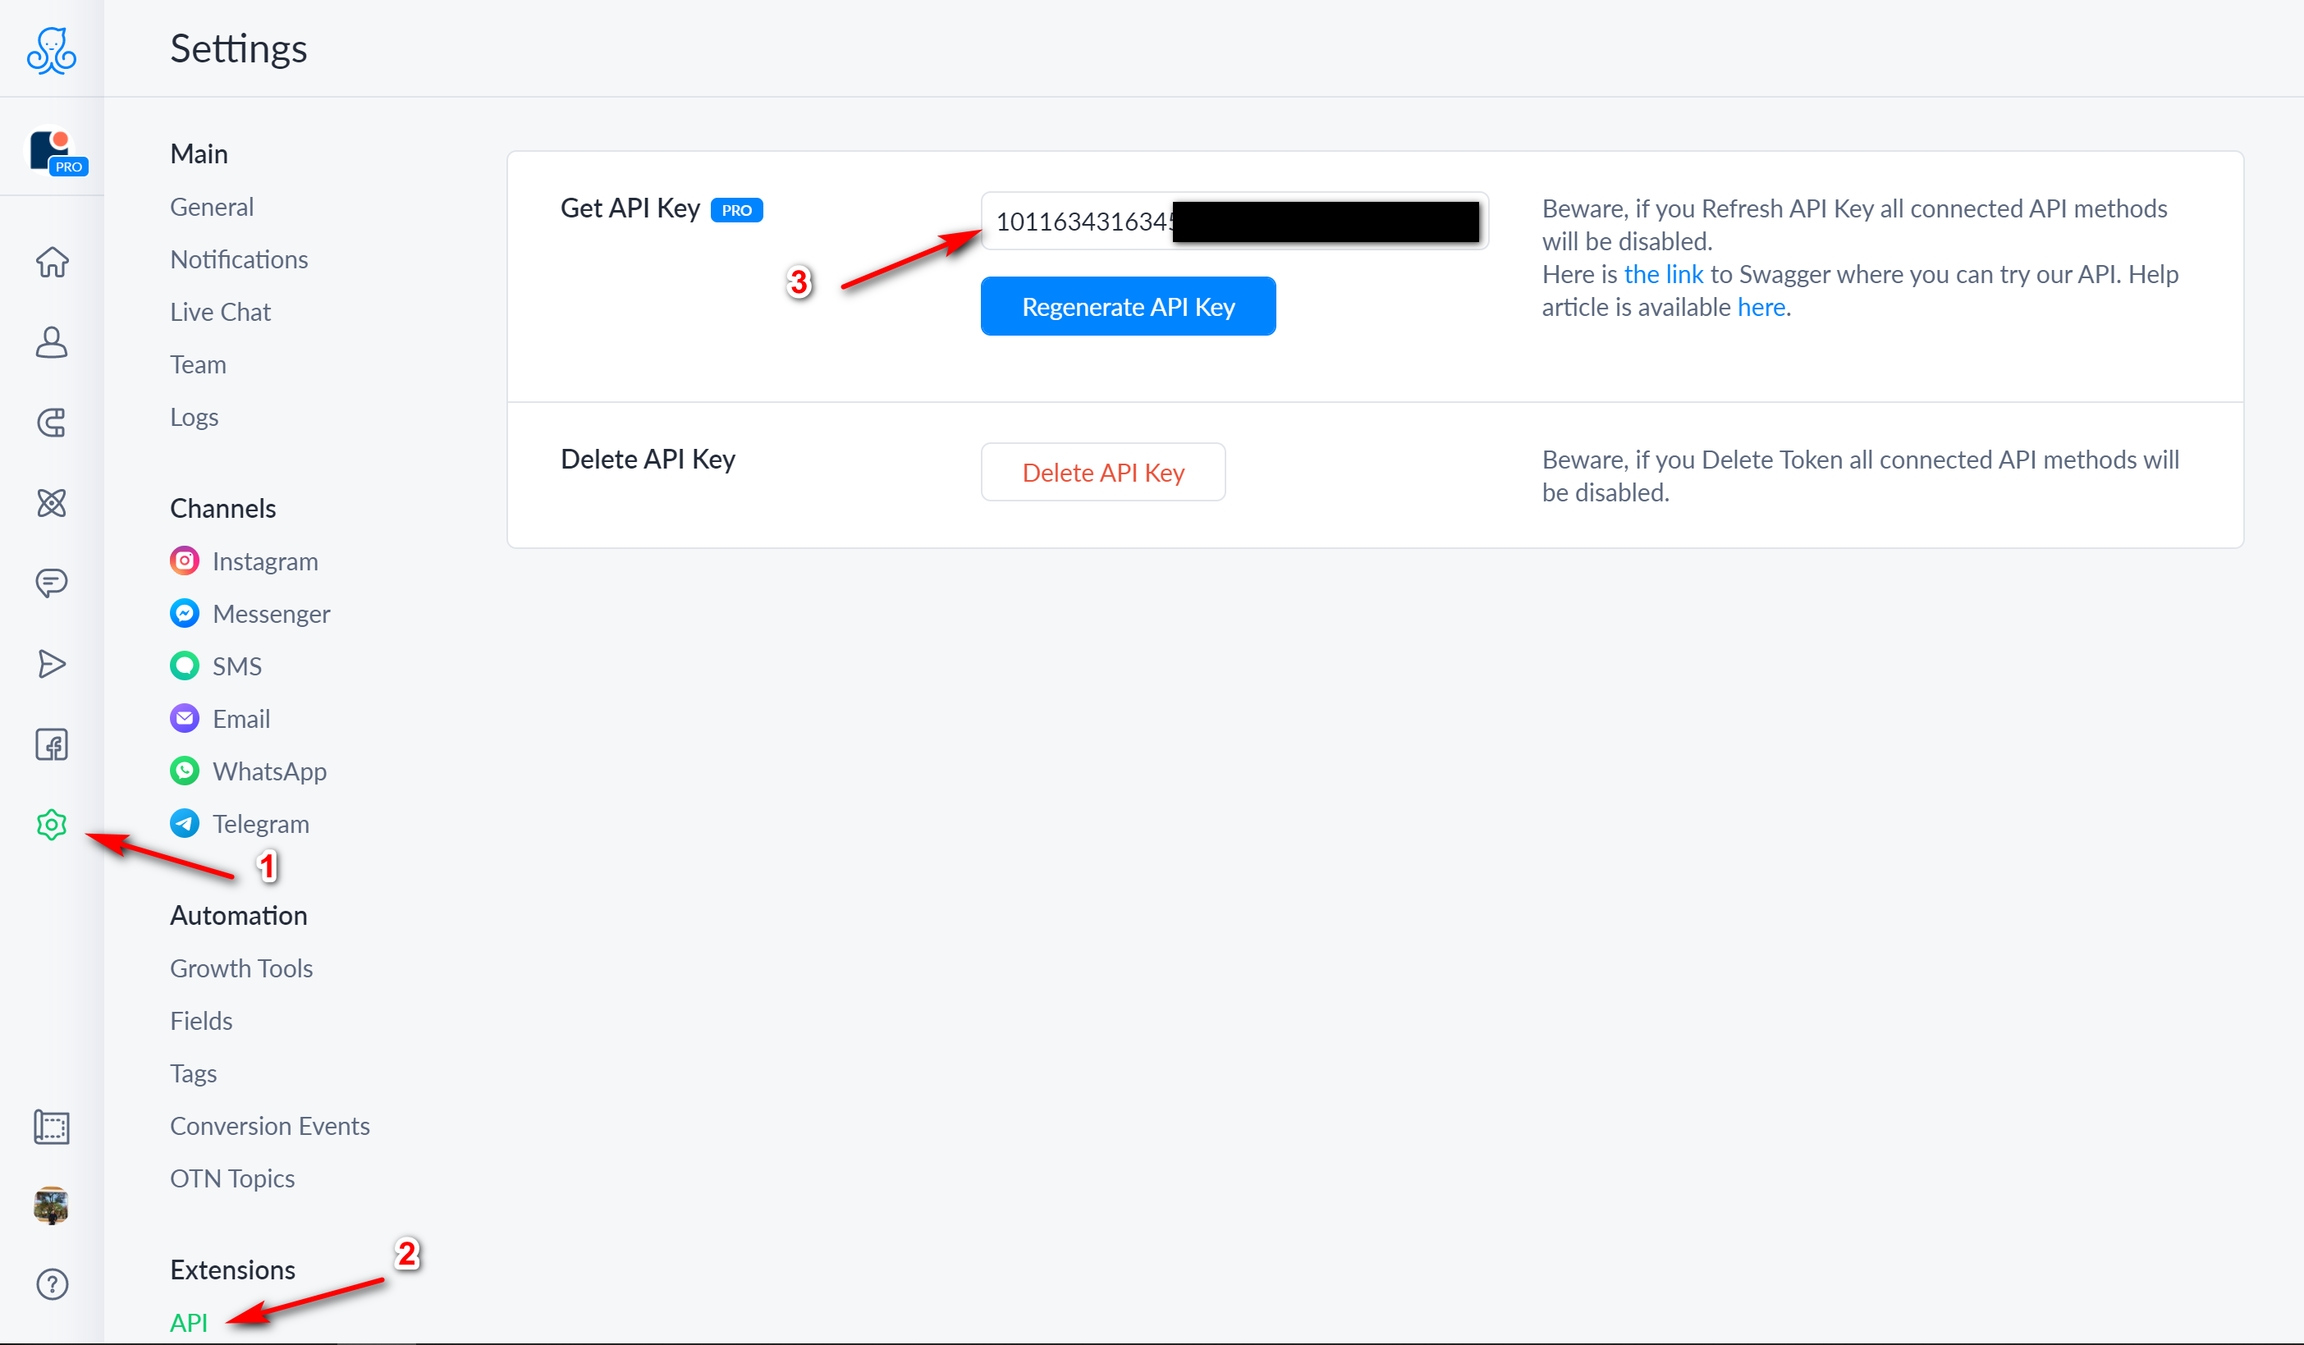
After copying the Flow ID, go to Settings, Click to API in the list and copy the API Token segment of Manychat and paste it into the Bot Token section.
Step 5: Configure data transfer from botplus.io
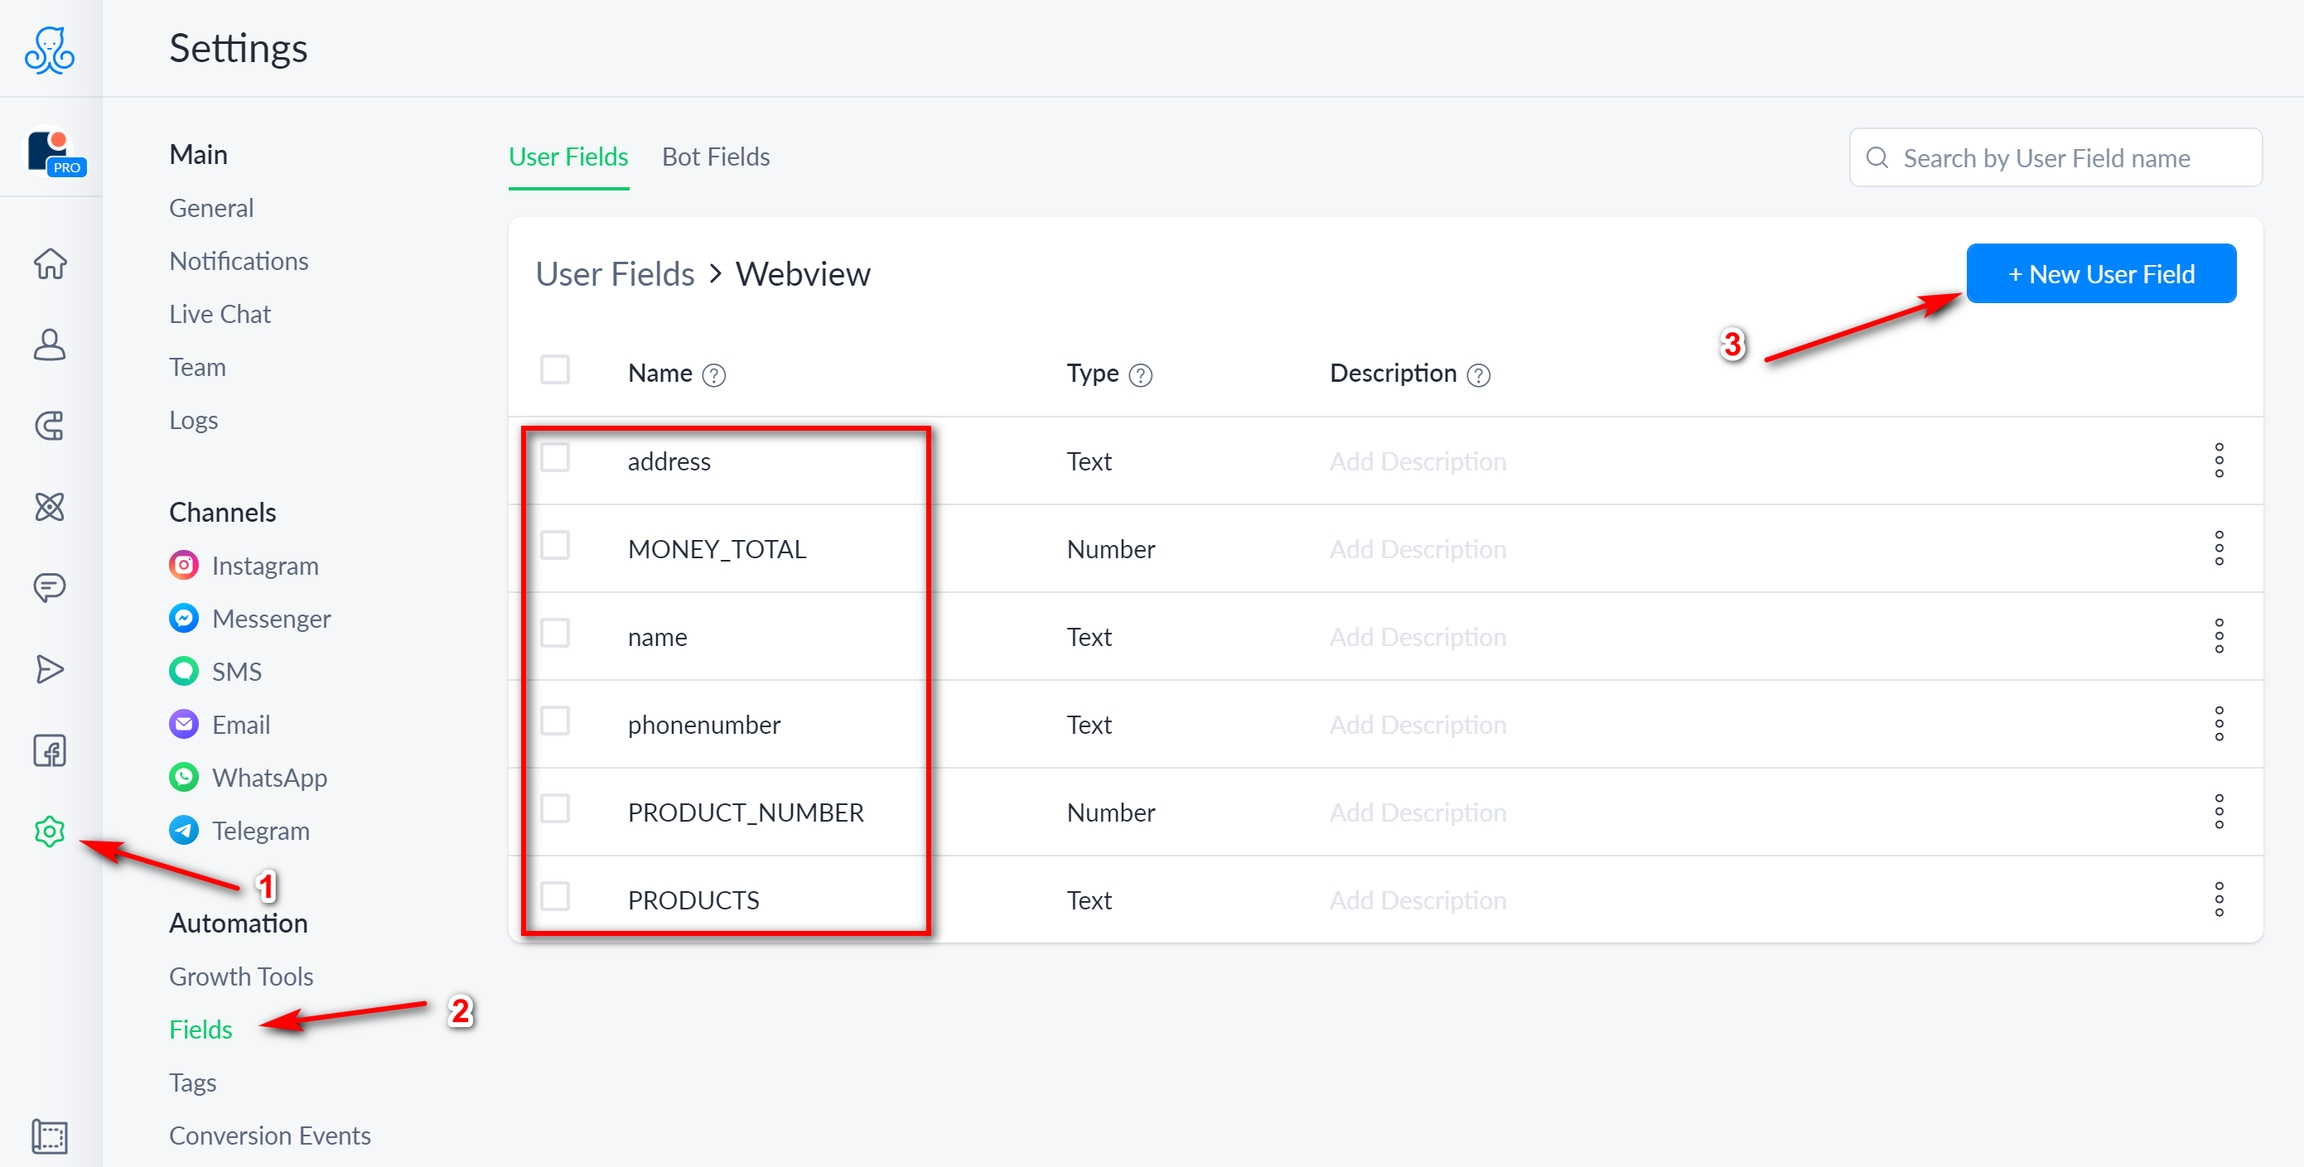
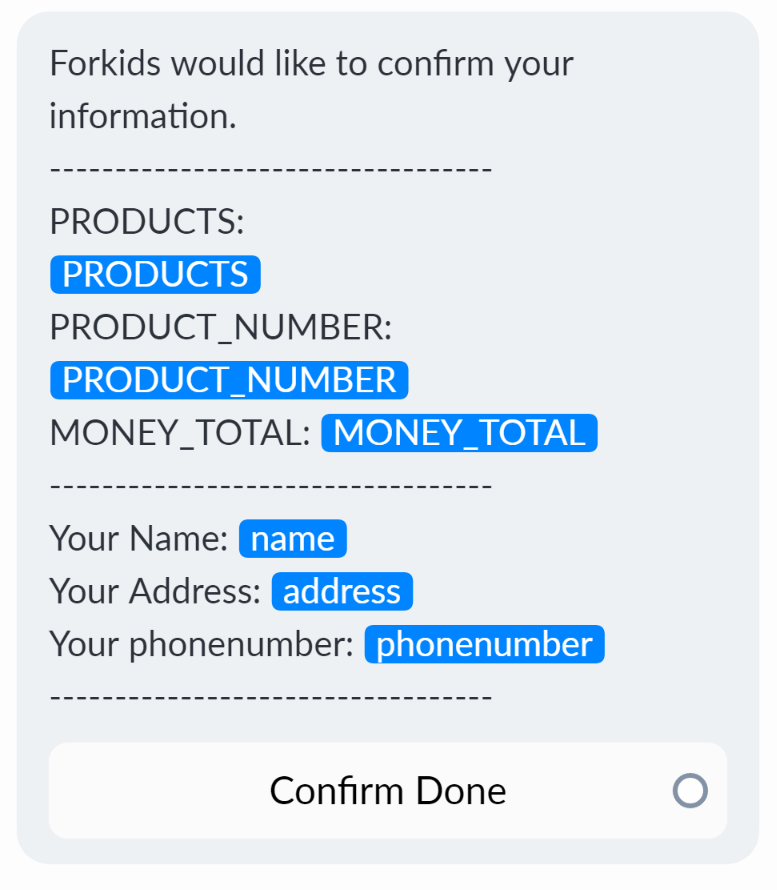
5.1: On Manychat, go to Settings, select Fields, then create User Fields corresponding to the customer's confirmation information.
5.2: In the configuration panel of the Push Data section, select Add Field to add data fields sent to Manychat
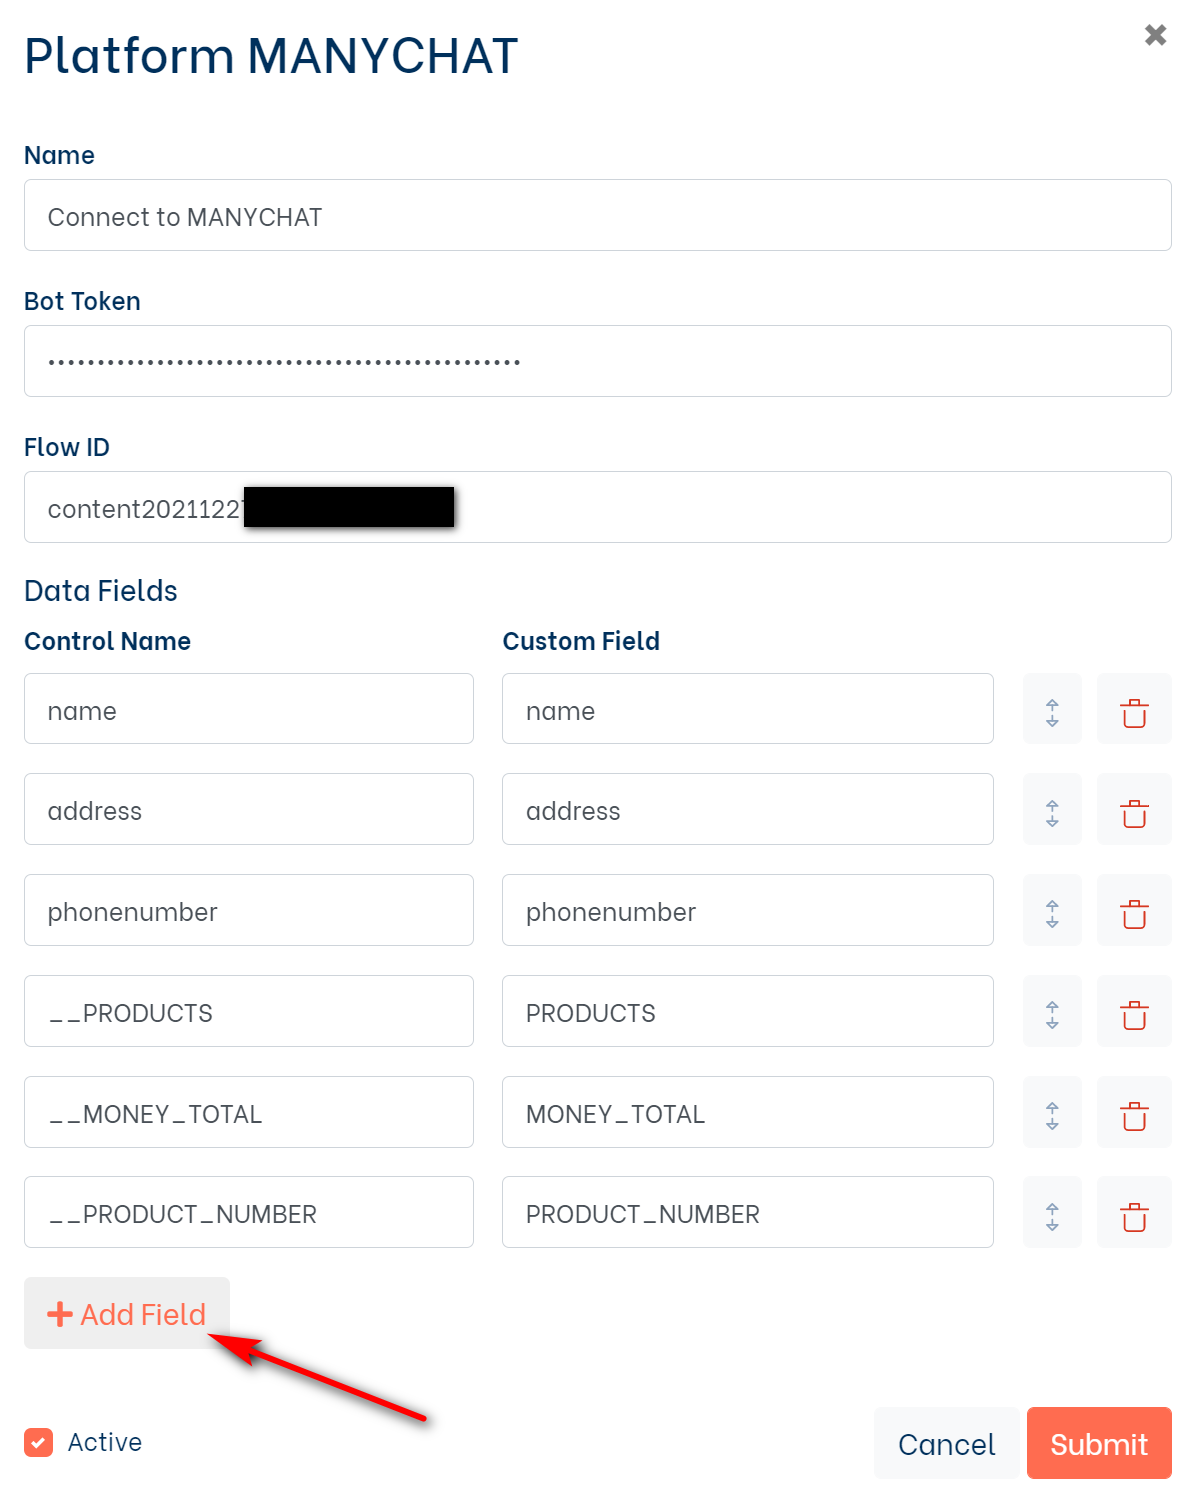
Select the Control Name section and you will see the data fields, this field is created during the process of you building the Webview. And the default fields eg: Money Total, Products of the Shop section.
The control Name column is the variable name column that you get in the form, and the Custom Field column is the custom field that you want to pass on to the bot.
Bước 6: Build Flow 2
In Flow 2, you create a Text card and enter custom fields to this card.
Step 7: Configure URL for Webview
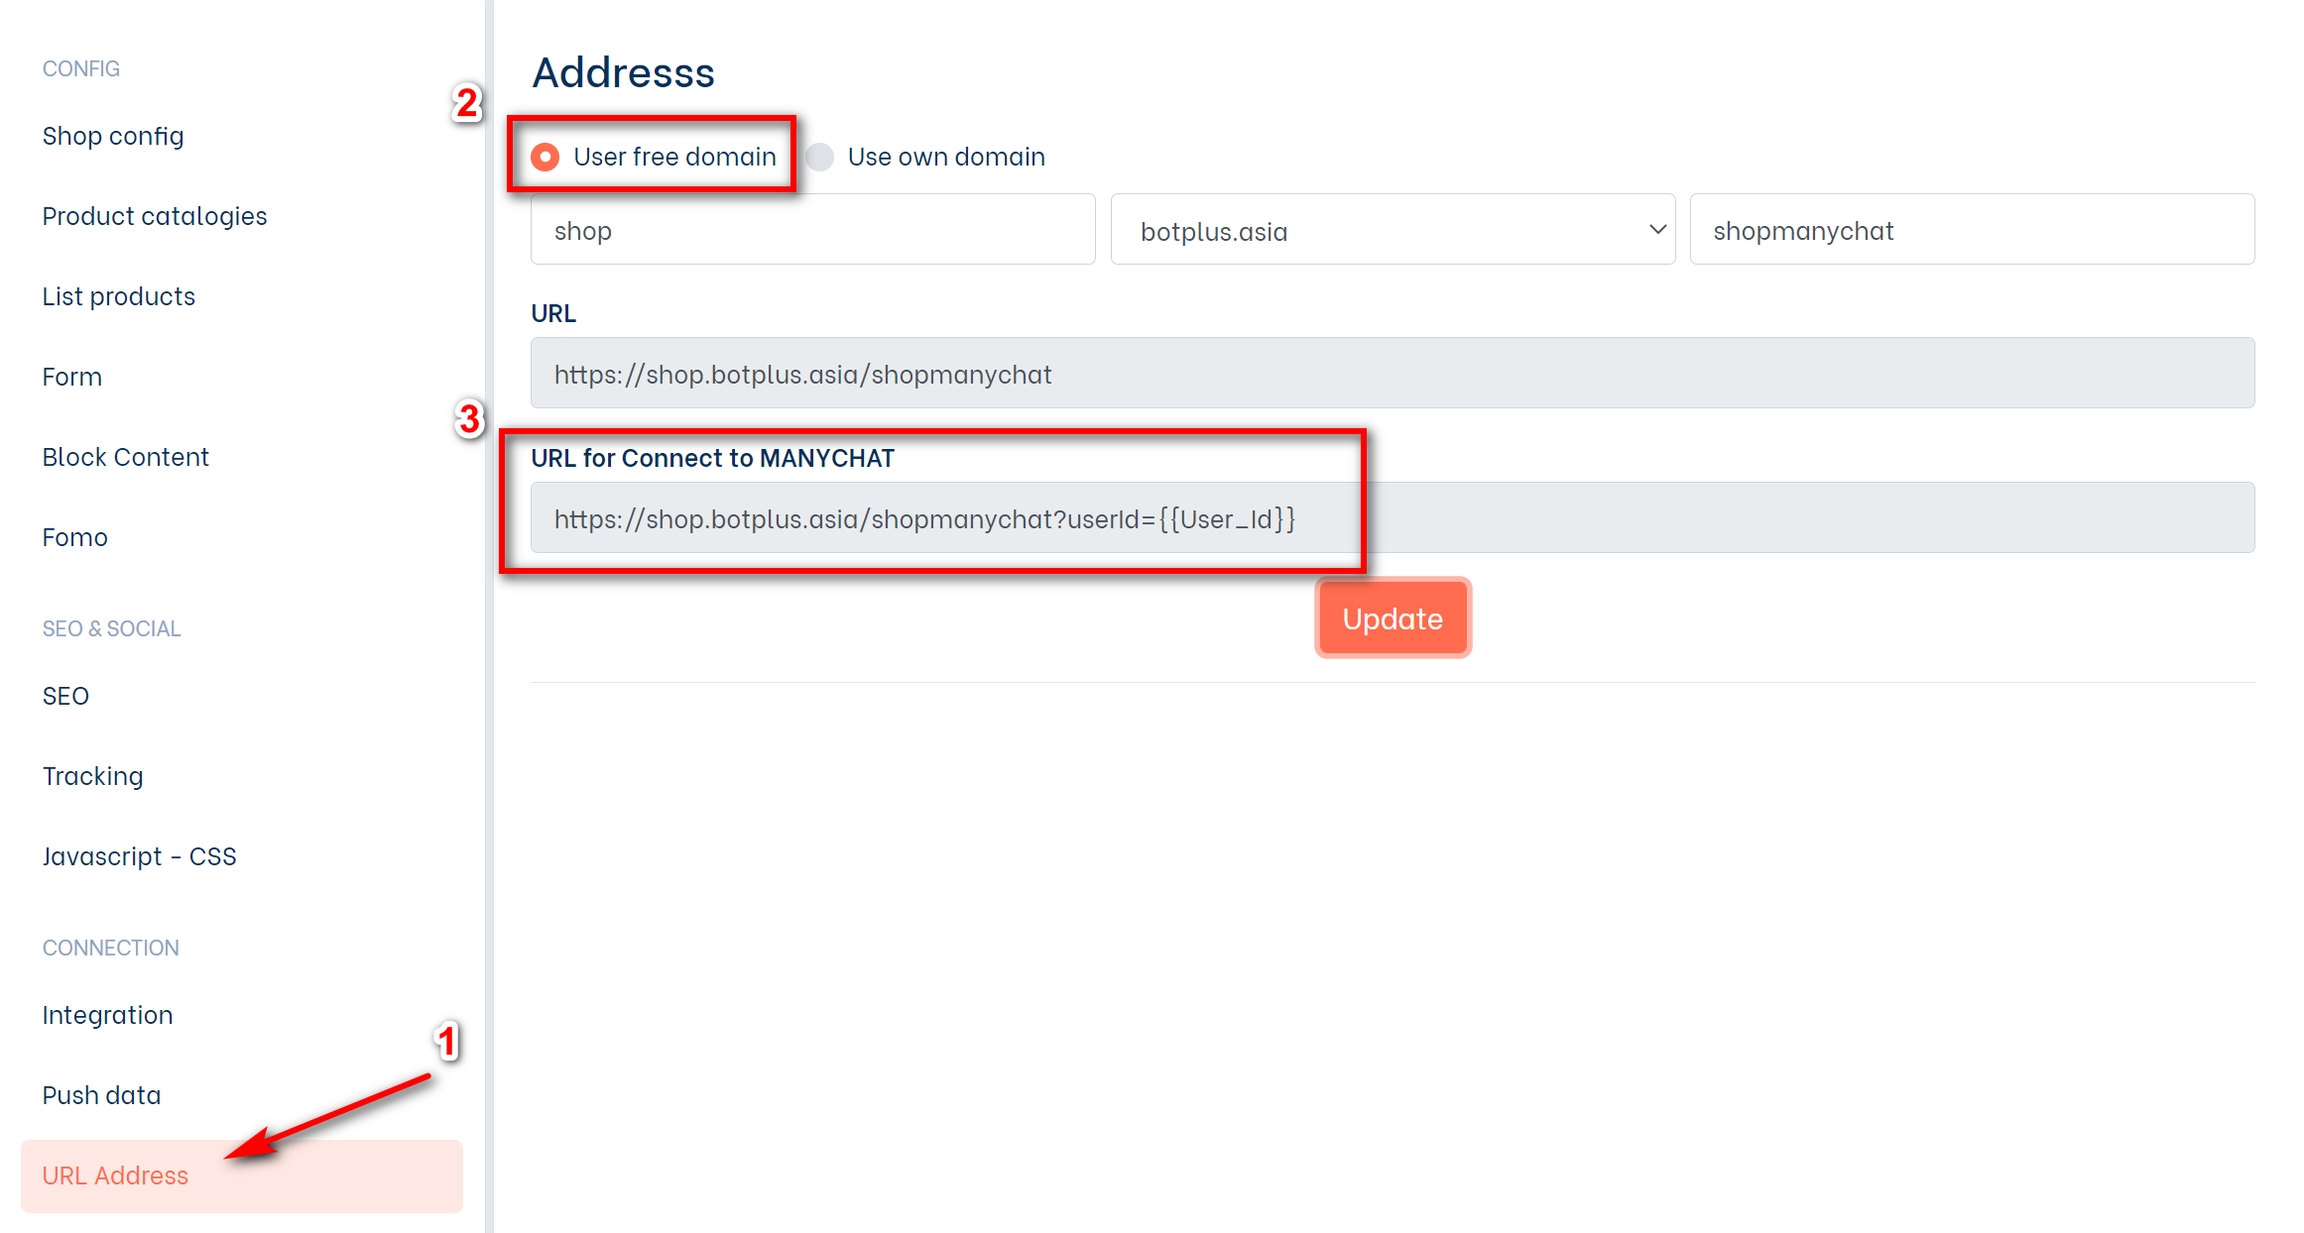
You choose to Menu URL Address (1) and select User free domain
Note:
You can customize the items in the free domain to fit your needs. Ex: shop.botplus.asia/shopthoitrang
You can use "Use own domain" to use your own domain VD Shopthoitrang.vn
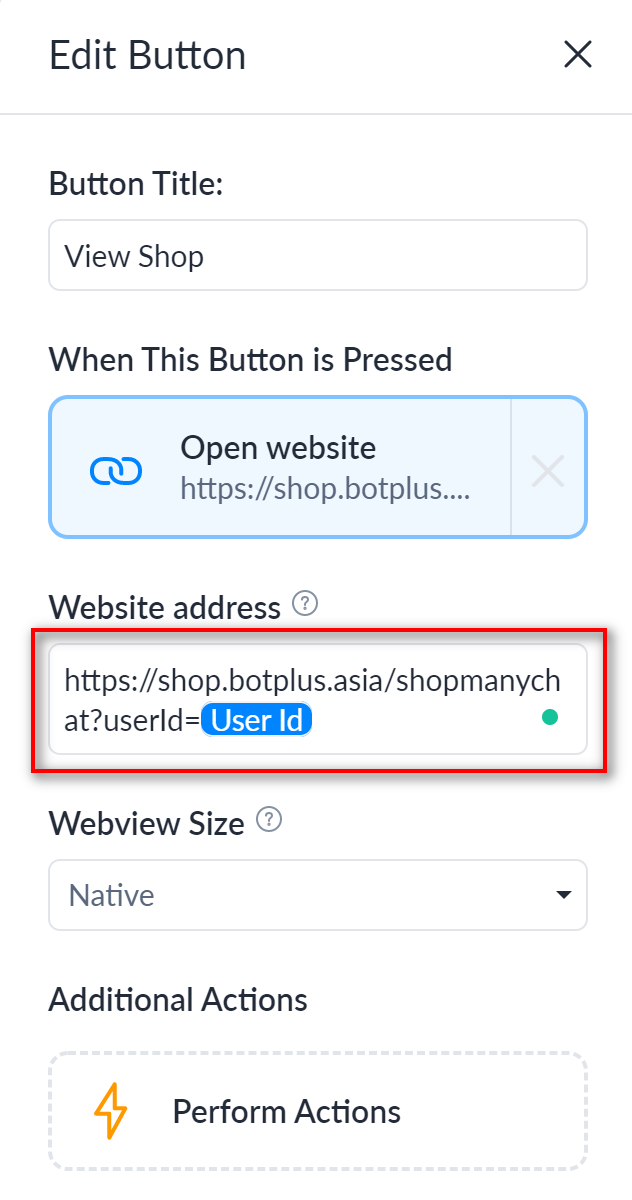
You click the Update plugin in botplus.io then select item 3 to copy the link for Manychat (the link in the URL above is used when you want to run the web without embedding the chatbot)
Step 8: Connect the plugin to the button.
In Flow 1, select Add button (you can also use the Gallery or Media tab)
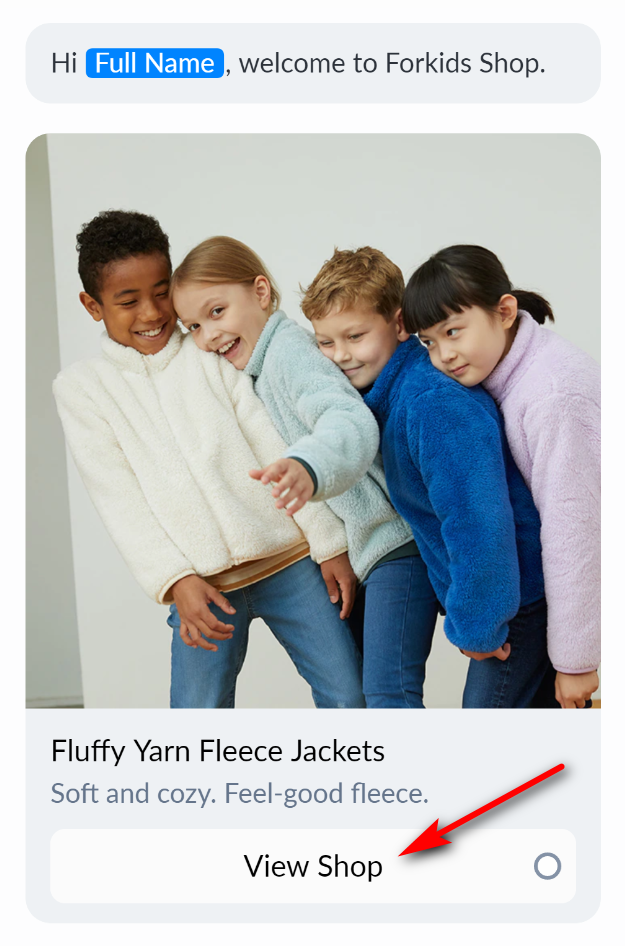
You enter the button name (eg: Shopping) then select the Open website tab and paste the link copied in step 7.
Step 9: Test Demo
After completing the steps above, select publish and press preview to test the bot.
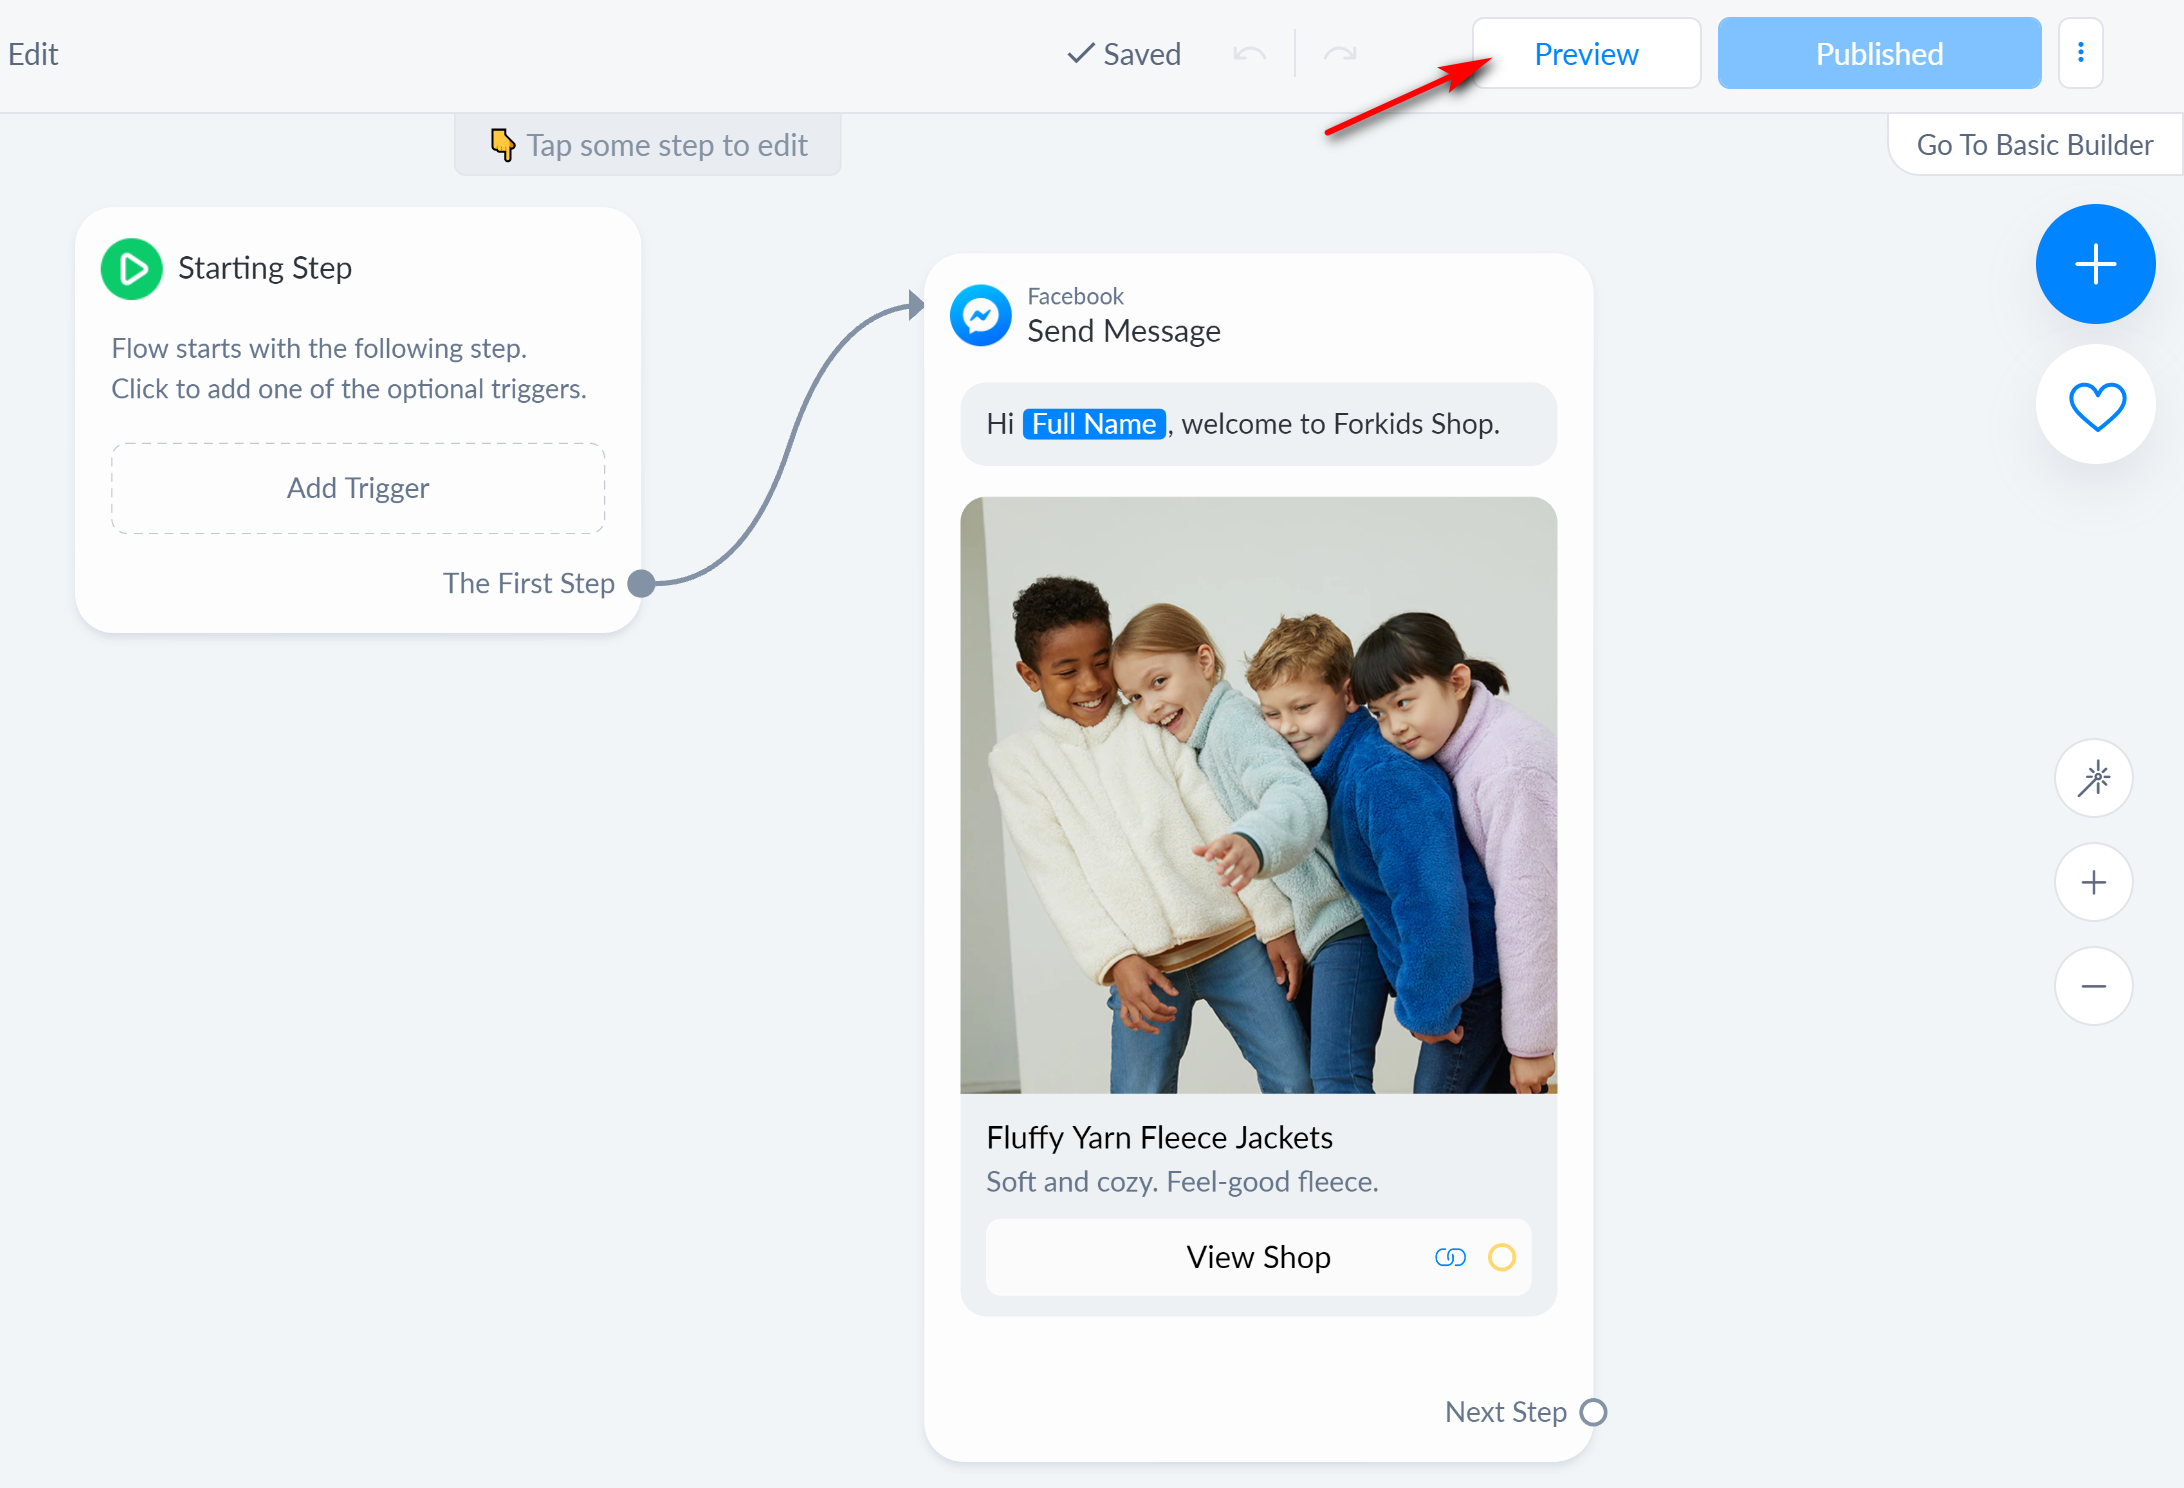
Messenger will send messages and press buttons to open webview.
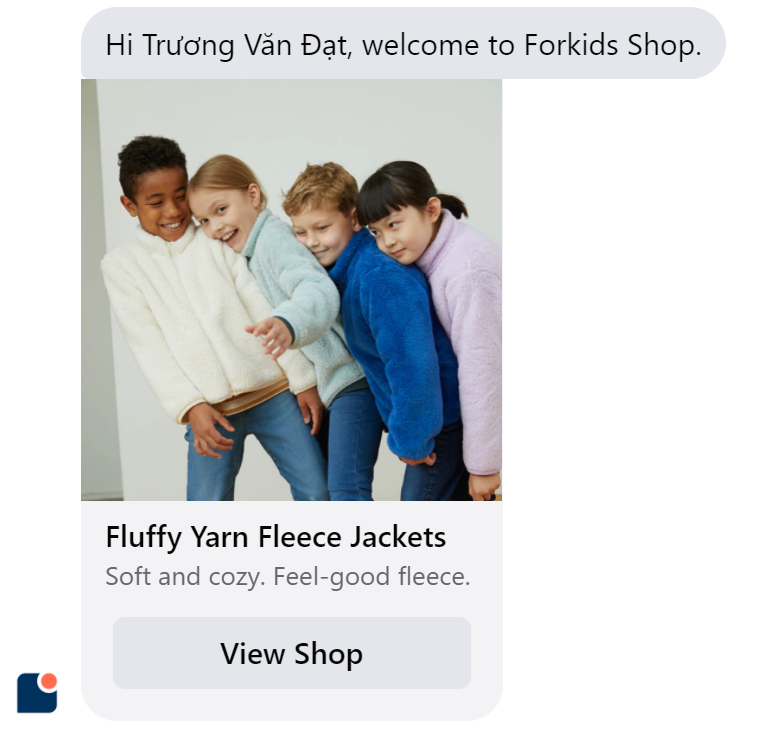
Choose View Shop and start your online shopping experience.
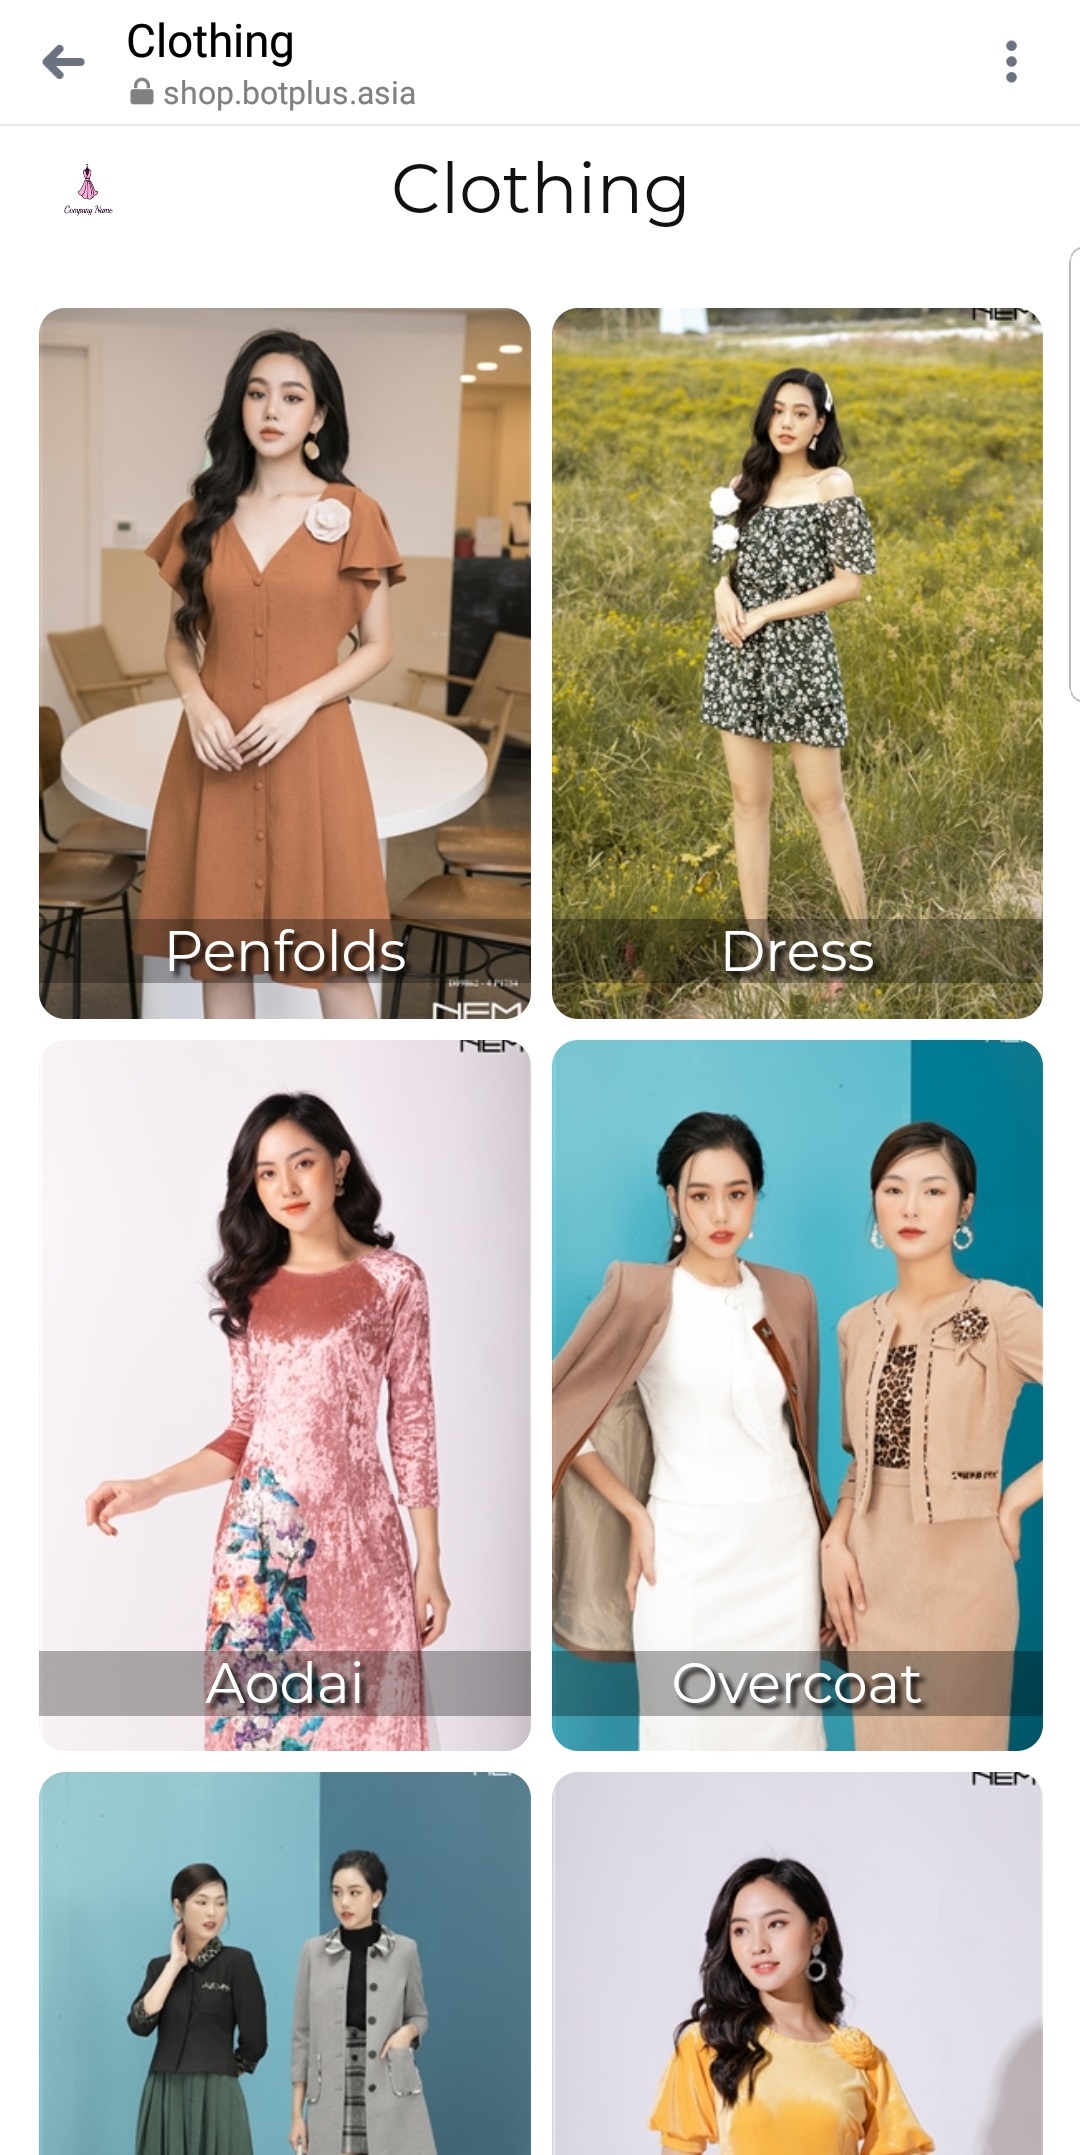
Next, you fill in all the information in the Form section
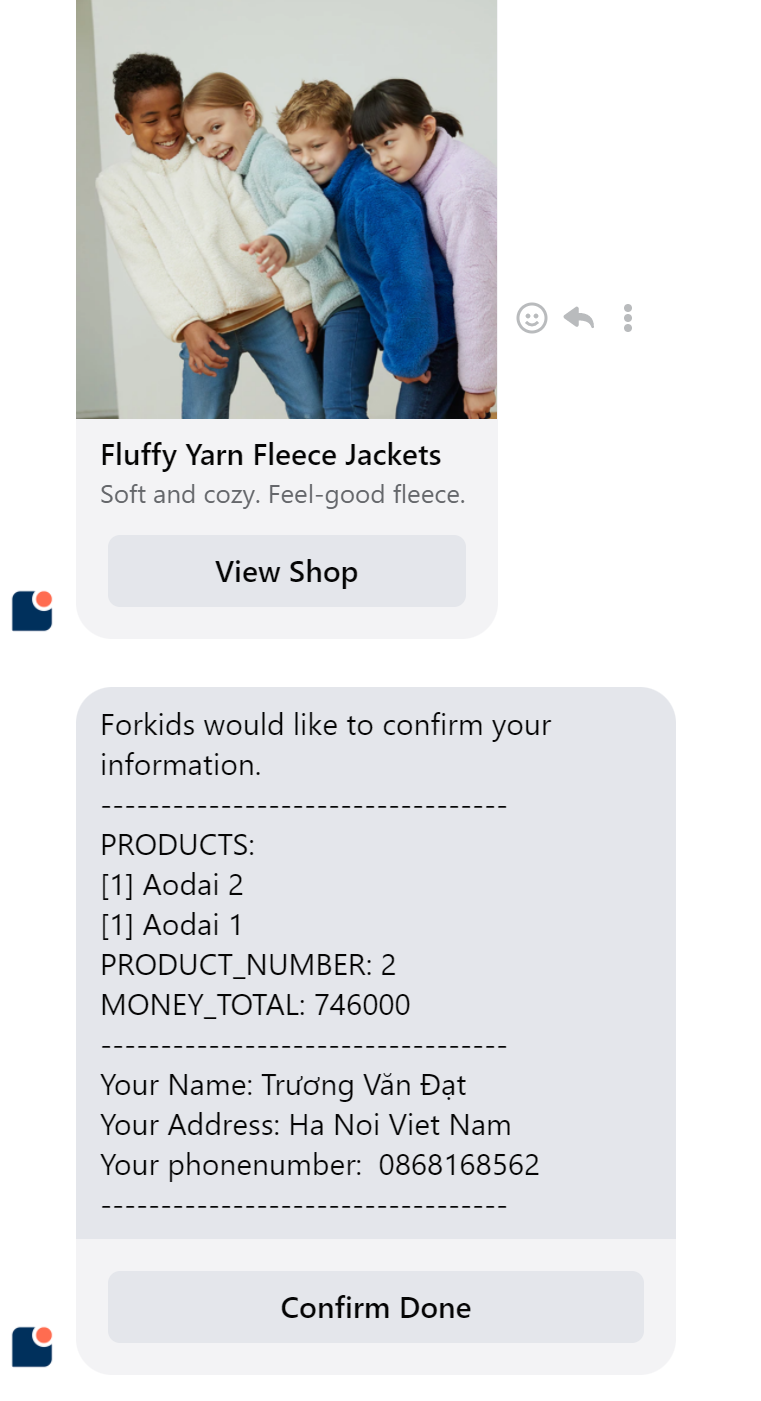
The bot will confirm the information you just ordered:
Last updated